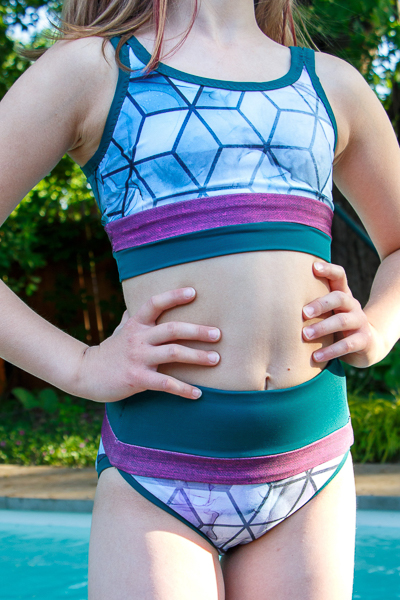
It’s that time of year again where we allow ourselves to believe summer really IS on its way! And so it’s also time to present our newest swim pattern: Perch.
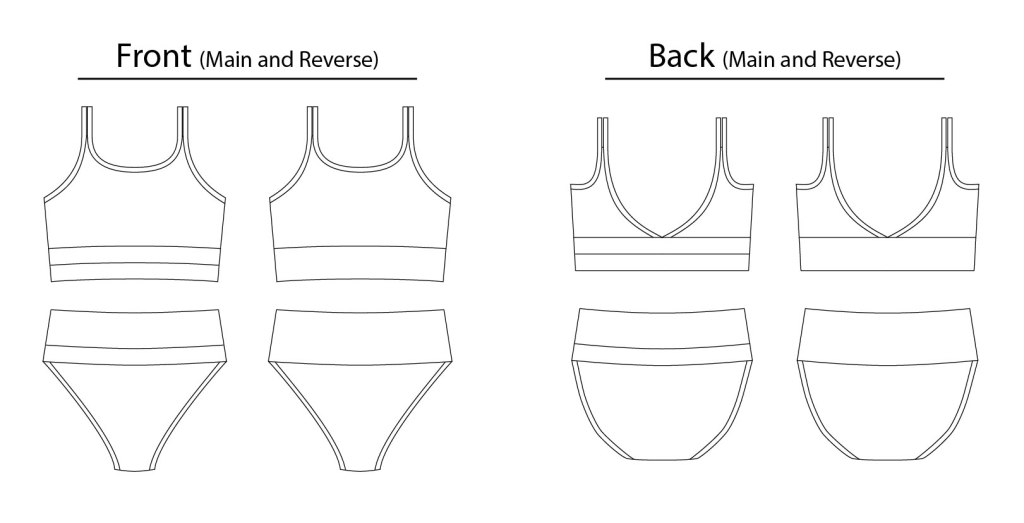
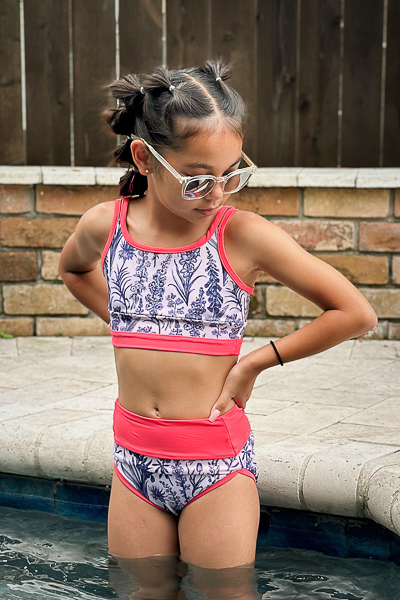
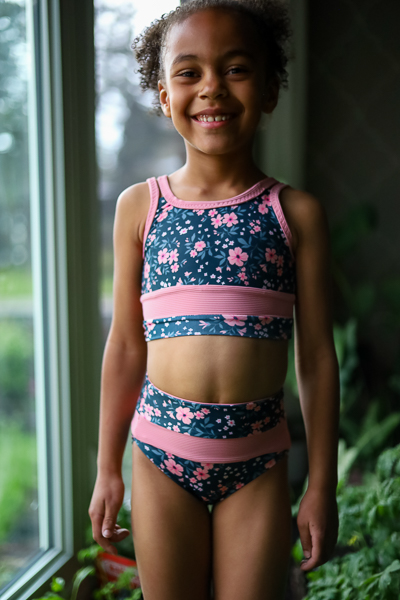
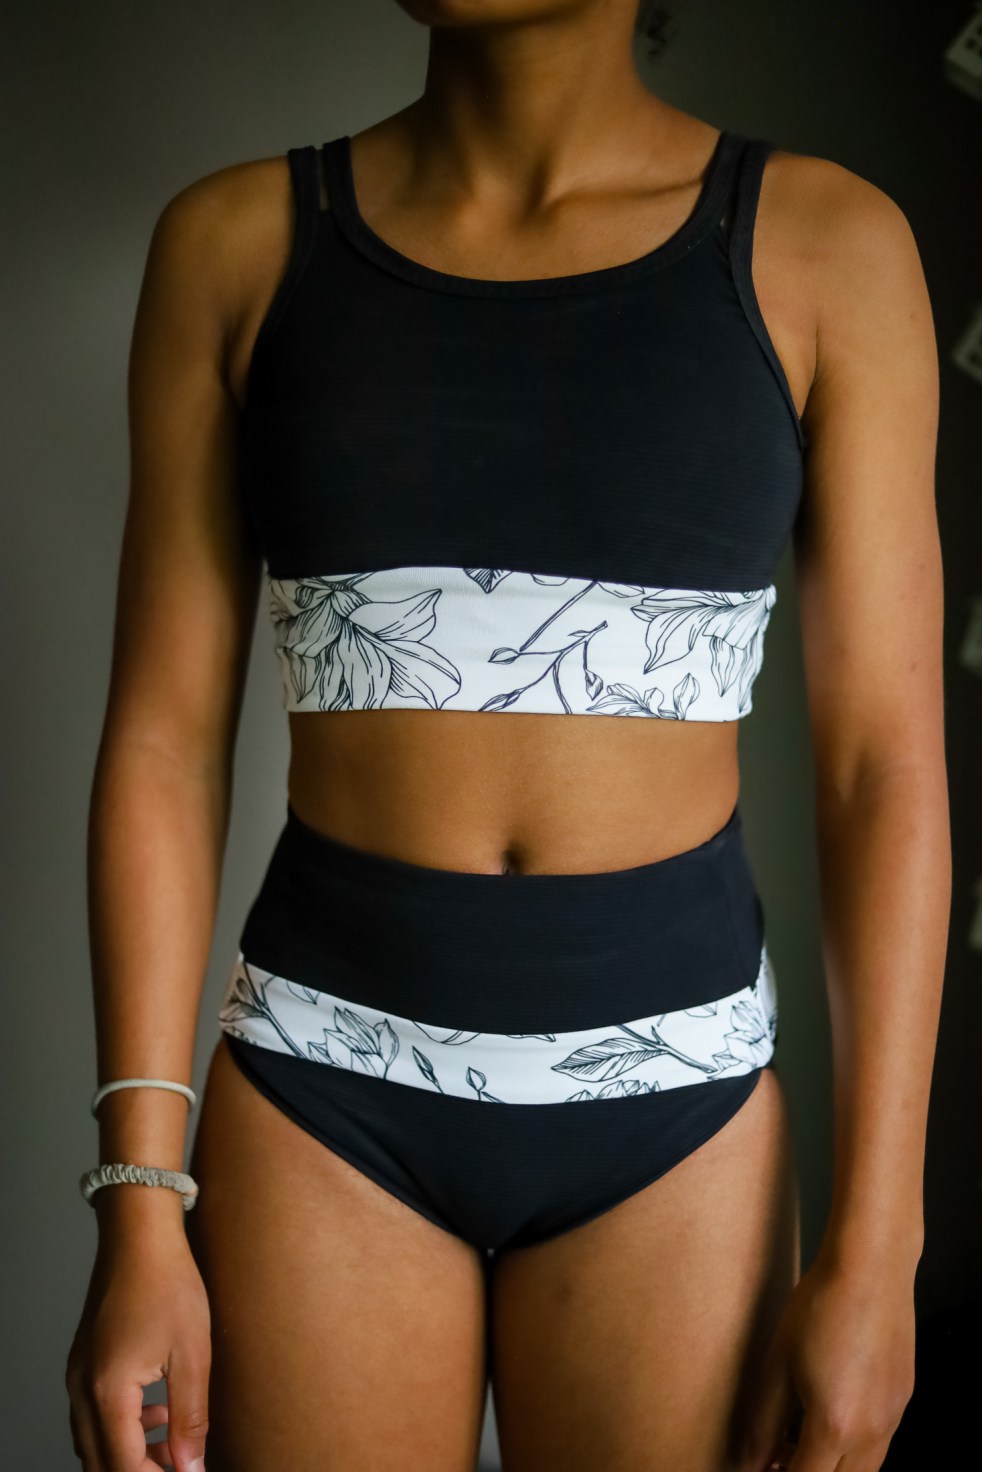
Perch is a fully reversible two-piece swimsuit that lets you mix and match to create up to four beautiful looks. Available in our girls size 2-16 size range, this swimsuit features a high-waisted bottom that will sit at belly button level. Banded leg openings with added elastic for stability and a higher cut side give the bottoms a trendy yet modest fit. Make sure you pull those bottoms up to the right spot to avoid sagging fabric/bum area and get a nice sleek look!

The matching top has a wide hem band and uses binding to create double straps.


Don’t let that binding intimidate you though! Our best tip for swim binding is to use a glue stick to help tack each layer in place. Then use lots of pins and take your time topstitching everything down.

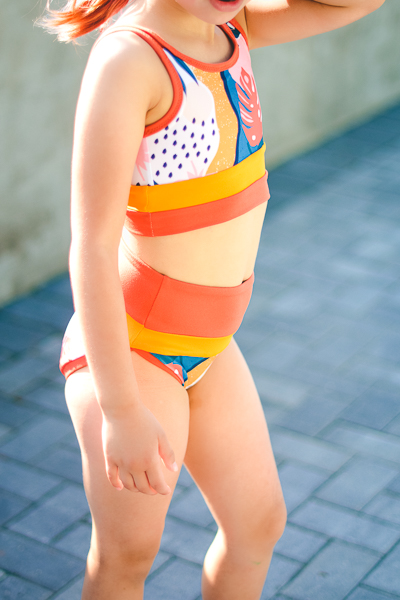
Both the waistband and hem band showcase a fun pieced/striped design on one side and a solid color on the other.

I should mention that even though the tutorial for this pattern will show the pieced waist and hem bands as the “Main” side and the solid bands as the “Lining” side, you CAN choose to use either the solid or the pieced look on both sides of your suit instead of having one of each.
My older daughter is at the stage where she prefers a bit more coverage in her swim tops and always asks if I can add cups. The suit likely wouldn’t accommodate much more than an A-cup without adjustments, but in our case that’s all that was needed. I made the size 12 top for her and the cups JUST fit. The best part is that by doing it in the method I laid out below and by using only a thin padding this suit remains completely reversible.
- Cut an extra layer of suit front from power mesh or lining fabric.
- Pin cups to it, checking against the child as needed.
- Sew cups in place using lengthened stitch.

4. Layer suit front together by placing lining right side up, main right side down and then power mesh with cups. When deciding which way up to place the foam cup layer consider your main and lining fabrics. Thinner and/or lighter coloured fabrics would benefit from having the power mesh between that fabric and the cups.
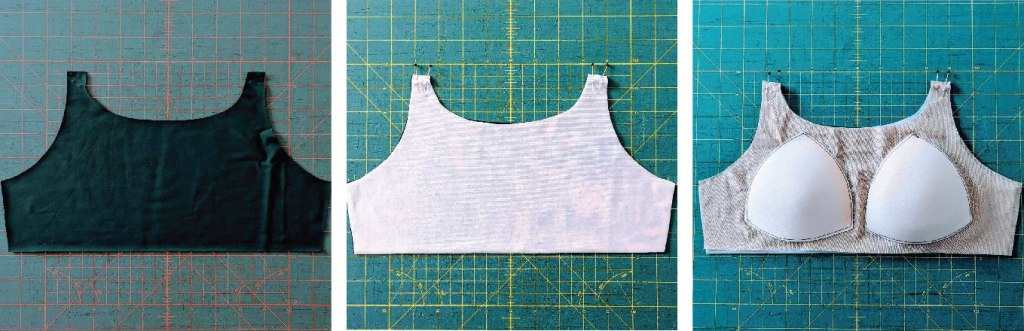
5. Continue assembly as outlined in the tutorial, treating the main fabric and power mesh/cups as one layer.
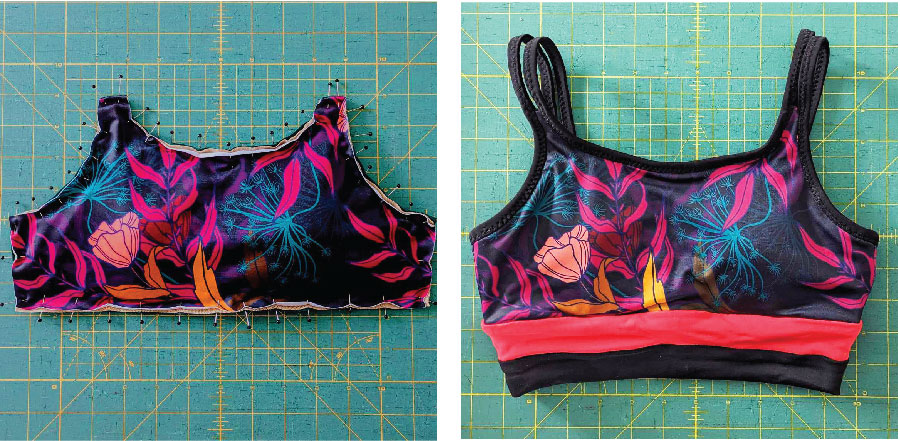
In the scenario above I was able to construct the suit as per the tutorial but the burrito roll was TIGHT with the added bulk of the cups in there. Below we’ve laid out another possible method for finishing the reversible suit without having to burrito roll it.
- After sewing the hem band to the bodice, evenly sew the UPPER hem band elastic loop to the WRONG side of the lining’s raw edge.
- Fold the lining and elastic over once towards the wrong side to encase the elastic between the lining.
- Fold hem band lining and main WST. The folded elastic edge should JUST cover the main hem band/bodice seamline. Carefully pin in place.
- Check the main side of the suit to make sure the pins show good hem band alignment. Topstitch along the pinned edge using a stretch stitch.

Of course, if you don’t care about your suit being reversible you can always just serge the hem band main & lining right onto the suit and simply topstitch the SA down.
One of our favourite things is seeing how others plan out and mix-and-match fabrics to create their own outfits. We hope you’ll share your own Perch suits with us on Facebook and/or IG! Tag @sofionadesigns and use the hashtags #sofiperch #perchinthewild or #sofionadesigns so we can enjoy your makes too!