

With yet another pattern coming out, it’s almost starting to feel like regular business around here. Almost. Full disclosure is that 2022 kicked us in the behind and we have a lot of ground to recuperate to help move us forward again. We’ve talked a lot about what styles we “should” design for you and want we want to design. Those 2 things don’t always line up. So while we pull ourselves up and fully embrace the new year, it’s become more about creating patterns that we are really proud of and excited to have in our own homes and closets.
While we do have a few quick and easy patterns, it’s not really something we’re known for and sometimes I feel like we should be catering more to the “quick and easy” market. Except while I do love a fast sew, it’s the more challenging patterns that we come away feeling really good about. We challenged ourselves – often to the point of hating the very pattern we’re working on – and ended up with something we are so happy to have in our store. And I think that’s what you’re going to continue to see from us. Patterns that really make us want to continue working.
Still, we’ve slowed down. We don’t even know how we pumped out as many patterns as we did the first year. We have no idea how other companies pump out the amount of patterns they do. We just know that we have to balance our work with our home life and lately that means a bit more home life than we’ve done in the past few years. So it’ll be long breaks between releases and dealing with the FB algorithms to try and catch people’s attention again after the breaks. (That part is mentally exhausting. I better not even go there right now….)
Anyway!!!!
Yikes! That was a little off track, but I think it’s ok to let you know how we think sometimes.
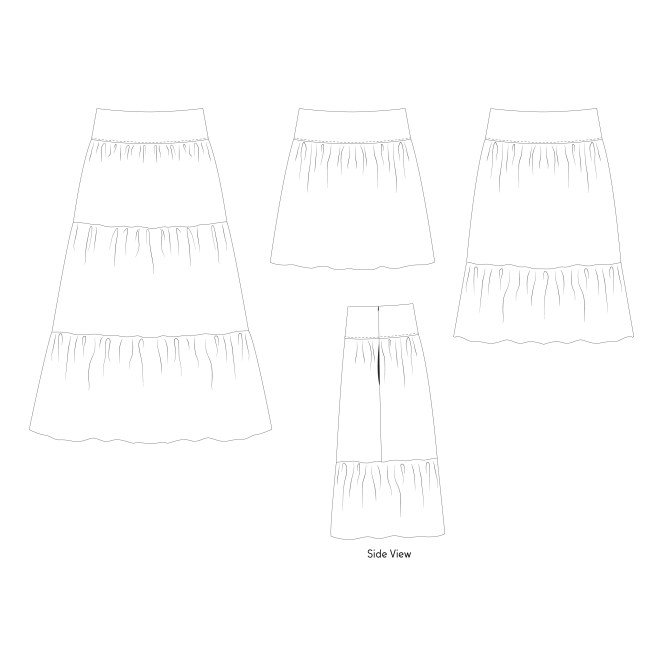
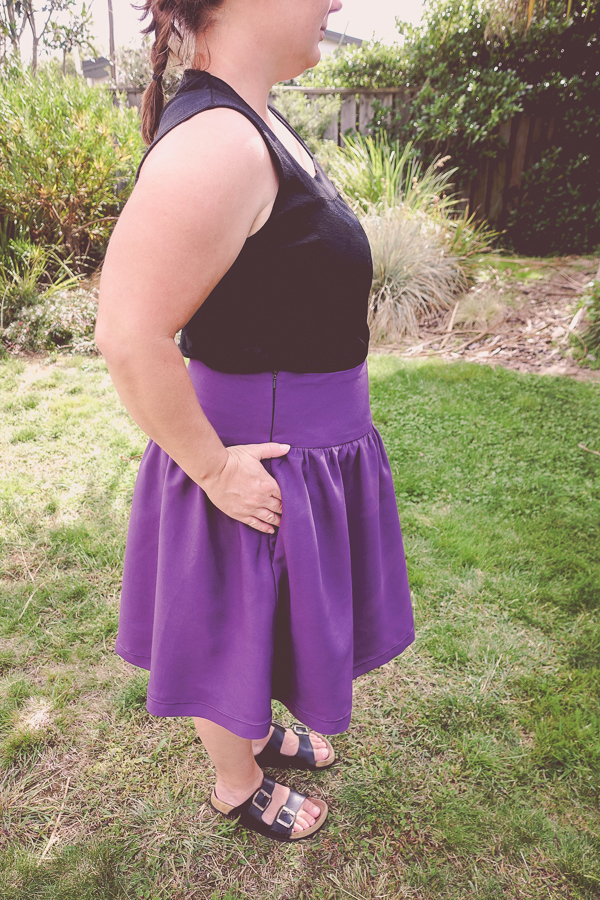
Now let’s talk about Miss Fern. We’re super excited about it!!

Here’s the details:
- flat waistband all the way around
- invisible zipper in the side seam
- optional inseam pockets (but not the typical kind)
- short length
- midi length
- maxi length
You might be asking “Is there a girls’ Fern?” and the answer is “not right now and maybe never”. I polled our testers and the resounding response was that people aren’t really interested in long skirts with side zips for most of the girls’ size range. Not good for potty training and not really appreciated by those littler kids. So for this moment, I went ahead with junior miss range only. This way at least the overlapping sizes 14-16 girls can still enjoy this skirt.
During this round of testing we really learned a lot about how much the fabric dictates the fit of this waistband. I’m going to point out the big areas of consideration and I have some general tips including a gathering video down below. Let’s get into this.

Fabric considerations:
The fabric chosen for the Fern skirt will have a very important role to play in the final fit of the waistband. The Miss Fern waistband was drafted to accomodate a range of woven fabrics, however, woven fabrics do behave quite differently within that range and it should be expected to think about this before beginning.
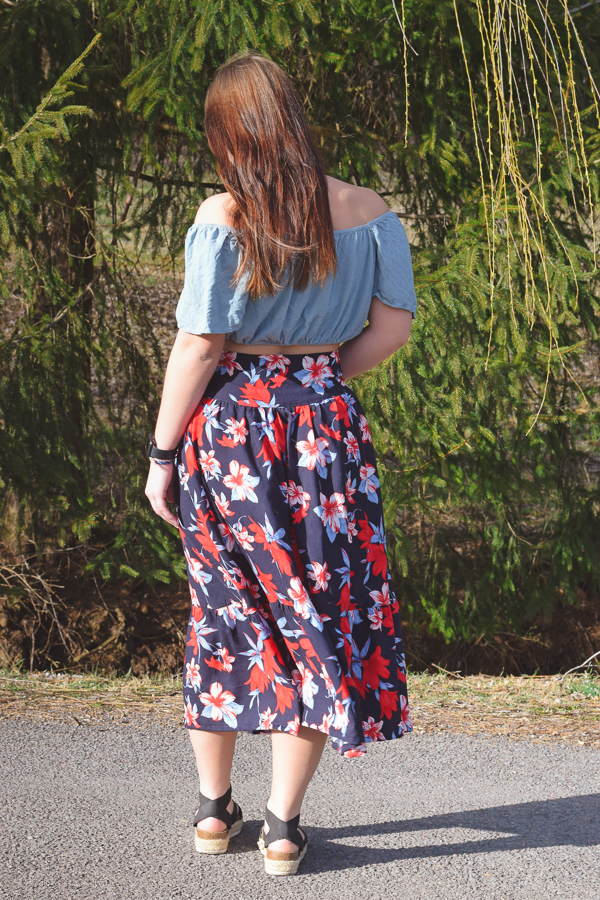
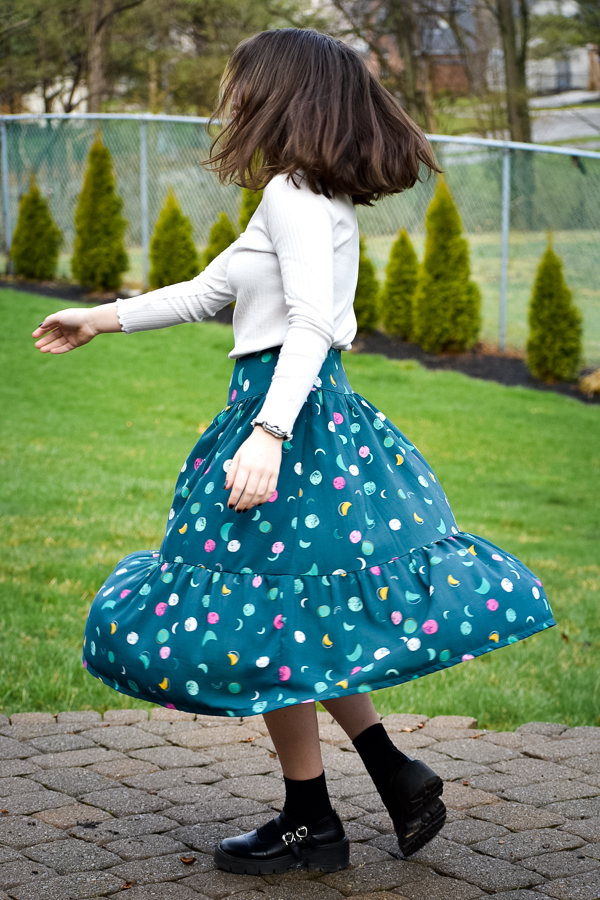
We know a long, gathered skirt is heavenly to wear with the gentle swish of a lightweight fabric. It makes you want to twirl and sashay around the house or supermarket. It makes you forget how awful rayon is to work with as you look affectionately at how it drapes in your arms. Yes, these shifty, temper-testing fabrics are what I’m recommending for this pattern. SORRY! But only sorry till you are wearing the final piece and swinging your hips around the house. Then “you’re welcome”. LOL

The lightweight fabrics, as I state in the tutorial, have quite a bit of mechanical stretch which means that you should almost always interface the waistband. Especially since these waistbands are cut on a curve and therefore cut on a bias which makes the “growing” fabric even more obvious.
These loose weave fabrics for the waistband often end up a bit loose and therefore sit lower than natural waist. In this case, remove some width from the side seams when doing your fit check of the waistband. Or, maybe you WANT it to sit a bit lower. Then you might not want to worry about fully interfacing.
I will admit I’ve made a couple of these skirts without interfacing the whole waistband and it does work, but you really need to be very careful when pinning and sewing because one other thing interfacing does is help to make this fabric easier to work with. That alone might be all you need to know to grab the interfacing! Without it, it IS a slower, more tedious process when dealing with shifty fabrics.
Medium weight fabrics can also be used. I’m thinking maybe a corduroy waistband with a lace skirt. In this case, there is not very much mechanical stretch at all and maybe even none. For these fabrics there is no need to interface the whole waistband. That will only make it even tighter. Rather, do your fit check before attaching the skirt and, if necessary, let out some of the seam allowance to accommodate the fabric’s lack of movement. This is the benefit of a 5/8″ seam allowance.
Did you hear that? This has a 5/8″ seam allowance. Don’t forget!!

Interfacing the waistband:
So let’s say you’ve now determined that you should probably interface your full waistband. The tutorial states at least some interfacing for the zipper install, but you want that structure all the way around. What kind of interfacing should you use and WHERE should you apply it?
I did a bit of research on this subject and here’s some points I found.
Waistbands are one area where interfacing can be applied to the main outer fabric. Though we typically interface linings, I found multiple sites that said waistbands and collars are often exceptions to that rule and it depends on the scenario. In the case of Miss Fern, I’m going to recommend interfacing the outer or main fabric. This will keep the whole band looking smooth and sleek. Plus, when you press the waistband, you won’t have the seam allowance clearly outlined on the front of your skirt! Further below we have an example of one other reason we choose to interface the outer fabric and not the lining.
HOWEVER….. It’s important to use a similar weight interfacing to the fabric you are using or something lighter. Using a regular woven interfacing that is closer to the weight of a quilting cotton, doesn’t really work on drapey fabrics. It will end up restricting the interfaced area “taking over” the main fabric with its more structured weave making the interfaced areas behave differently than the rest of the garment. The drapey fabrics are better paired with knit or tricot interfacings. This allows the fabric to move as it wants to, but restricts it from moving TOO much.
You can also choose to add another layer of fabric to your main waistbands and baste them together. You would then treat this as one piece of fabric. The added layer gives some extra stability. This is something that is recommended for more experienced sewists, so “they” say. I did this with one of my skirts that was very lightweight and then used a linen for the lining. This waistband does widen a bit after wearing, but that only means it sits a bit lower than other ones and I’m good with that.
Another option is to interface your fabric BEFORE cutting your waistband at all. This really ensures a nice clean cut and no fiddling around trying to make your fabric match the interfacing. This does, however, mean you use up more interfacing in the end. So make that choice as you will. Interfacing is hard to come by for me so I’m pretty picky about how much I waste.
So about that example I mentioned.
With permission, I want to share a scenario that one of our testers unfortunately experienced. This situation prompted a lot of this interfacing talk we’re having now. She knew she wanted to interface her waistband, but I had not thought to add much info about how and where into the tutorial. So she ended up interfacing the lining fabric instead of the outer. She also used a regular woven fusible interfacing. This interfacing applied to the inside lining created a lining that was much more structured than the flowy fabric of her outer waistband. You can see in this picture how much wider the main fabric was sitting in comparison. Significant, right?! These lining, main, and interfacing pieces were all cut from the exact same pattern pieces so they SHOULD have matched. Except for those darn drapey fabrics!!
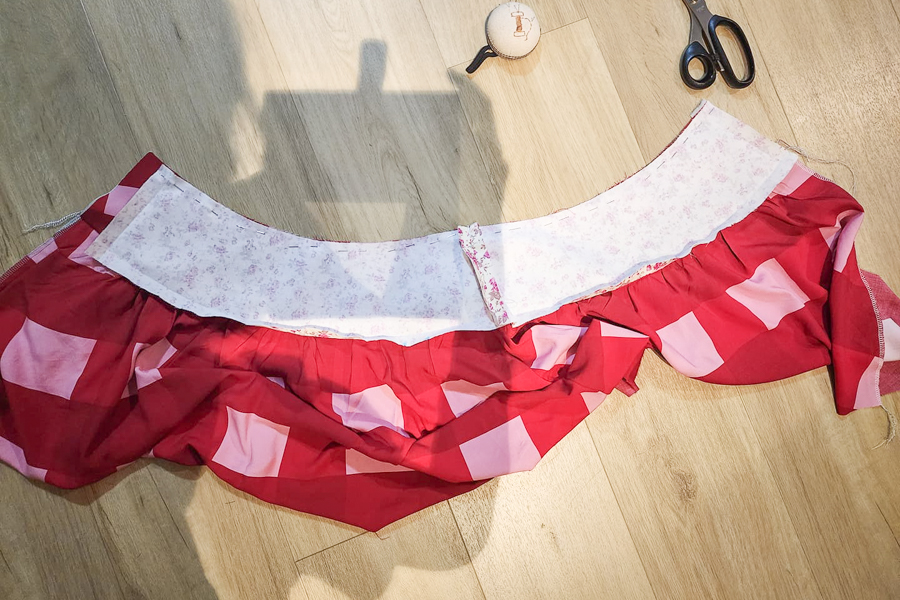
This combination of events caused the outer fabric to drape – as it wanted to – but because the lining was now much more sturdy, it was controlling the whole waistband and the loose fabric on the outside had nowhere to relax. So it pooled along the bottom edge. Added to that, any efforts made to match that seemingly wider piece try to the structured lining now caused twists and folds in the topstitching seam. No longer does the waistband have that smooth appearance we want to see.

To fix this, she unpicked the topstitching and for this occasion, she maneuvered her fabric so she could rather stitch in the ditch. Doing that, she was able to hide some of the puckering and made it wearable. And it’s super cute. I love this cheery skirt.

Gathering tips and sectioning:
There’s a LOT of gathering involved on this skirt. Especially if you’re choosing the maxi length. In the tutorial instructions I’ve used the typical “2 rows of gathering stitches” method and that’s what I like, but there are other ways to gather and Rachelle shared this technique video with us.
Another gathering tip that came up during this test was to steam or gently press the gathered edges BEFORE sewing. These pics show a very loose gather, but I hope you can see the effect here. The gentle pressing or steaming of the gathers hold them in place which is SO beneficial for this type of fabric that wants to slip around while sewing. Even pins tend to slip out of this fabric super easy, so pressing is a time saver in the end. I’ve been using this technique since Lindsay told me about it and I’m pretty impressed.

Have I lost you yet?? Seriously, though! For a fairly basic pattern, this is a lot of information!
Pockets
When you read “inseam pockets” my guess is that the majority of people have one particular style in mind. The one that’s sewn into the seam! Obviously. But have you ever put your phone in your skirt or dress pocket and then noticed how the phone just swung around all out of control around your leg as you walked? Were you super annoyed like me? Maybe that’s a Sherri problem, but it bugs me enough to know I didn’t want to do that on one of my own patterns.
The Miss Fern pockets (and it’ll be on upcoming patterns as well!) are sewn into the waistband which not only holds that pocket from swinging around too much, but also stabilizes the pocket itself making the weight of a phone less straining on the side seam alone.
When you get to the pocket instructions, you’re gonna roll your eyes at me, but I can take it. Because I know you’ll be happy with your final garment and learn to love me. I promise.
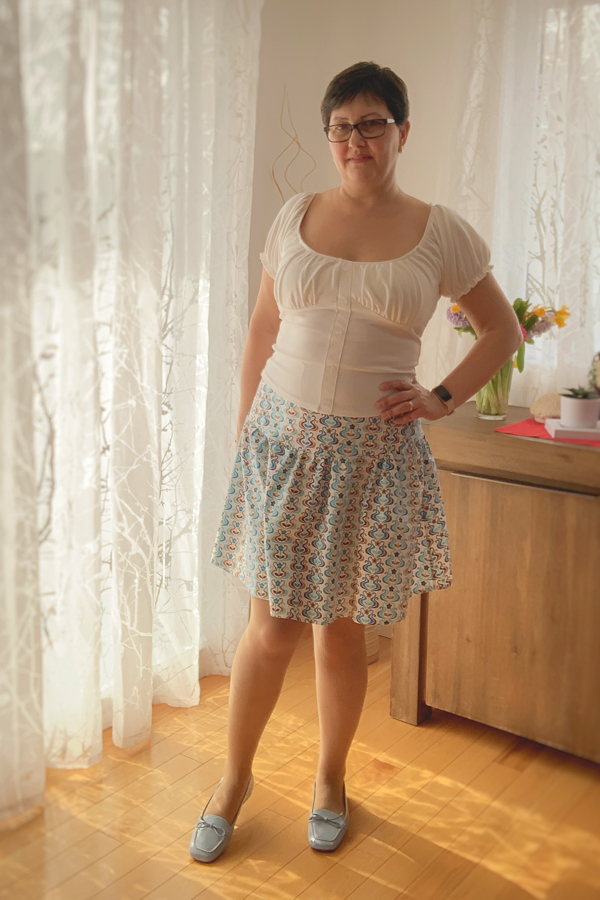
Do you like tucking in your shirts? Quite a few testers wanted this option in their Fern skirts like this one paired with the Miss Tundra top. First, that’s a super cute combo. Second, let’s just quickly say that if you are going to want to have room for a shirt inside, take that into consideration when you’re doing your fit checks, K?

Phew! That was a lot of information, but all important and hopefully very helpful. We know you really, really should always make a muslin of each garment, but I know most of you probably don’t. So by giving you this extra info, at least I’m helping you out with your bad habits. LOL
As always, share your Miss Fern or any other makes with us. It gives us great joy to see you enjoying our hard work and we hope you really do. You can share in our FB group or on IG. Use the tags #sofionadesigns #sofimissfern or #sofijuniormiss to see more and so we can find you.
I leave you with a few more tester creations for your enjoyment. Starting with the best way to avoid hemming.


I had to end with this picture of my daughter and I. Decked head to toe in all sorts of Sofiona patterns. My top is a hacked Miss Clover that I made specifically to go with this Miss Fern. Her outfit is her favourite Miss Wood Lily pants that I had to let out the hem because they were getting too short on her and her Rhubarb shirt that she’s outgrown awhile ago but refuses to put away. LOL

One thought on “The Miss Fern Tiered Skirt”