
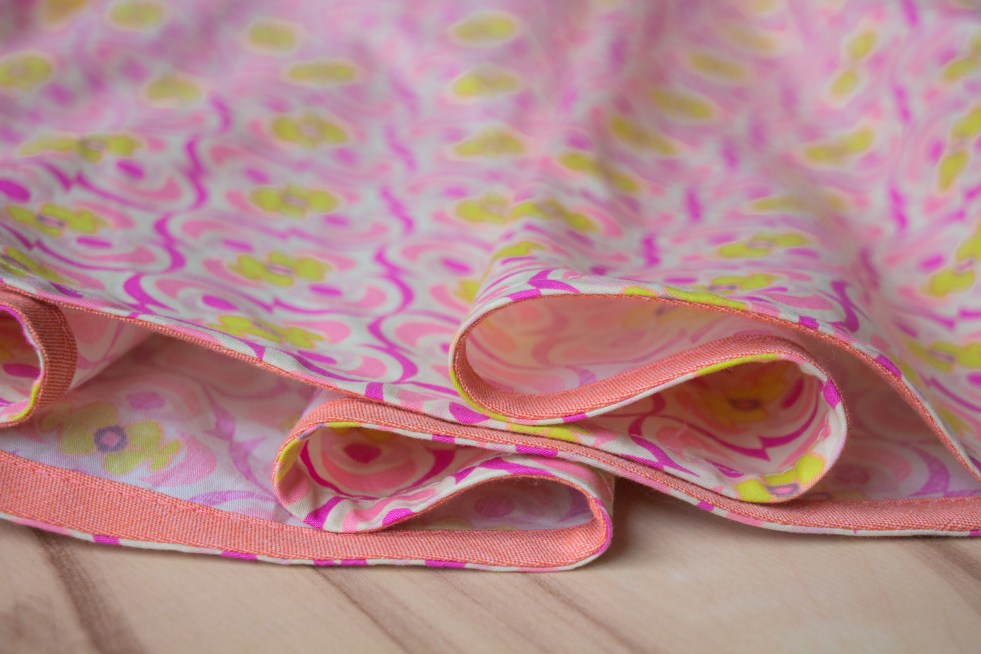
Bias tape, as the name suggests, is always cut on the bias of the fabric. That is, at a 45 degree angle to the fabric’s selvedge edge. This allows for some stretching of the tape, even when created from a fabric that is typically considered to be “non-stretch”. This is especially helpful and necessary when the bias tape will be used on a curved edge, as the stretch of the tape allows it to lay flat and un-puckered. Double fold bias tape is often used as a binding for raw edges in a garment. It can help achieve a clean finish when other methods (such as serging) are not possible, practical, or desirable. Single fold bias tape is more often used as a facing on openings such as the neckline, arm scye, or as a hemming option for skirts.
EDITED—- At the bottom of this post we have included instructions for hemming a circle skirt with bias tape.
Below we have two basic methods for preparing bias tape. (In our example we are making 1 1/2″ tape; which refers to the overall width of the bias fabric strip before folding, however this same method can be applied to any width of bias tape.) Both methods work well when you either have only smaller sections of fabric to work with, or don’t want to cut across the bias of an entire length of fabric. Small bias strips can be combined to create one longer section of bias tape.
METHOD 1:
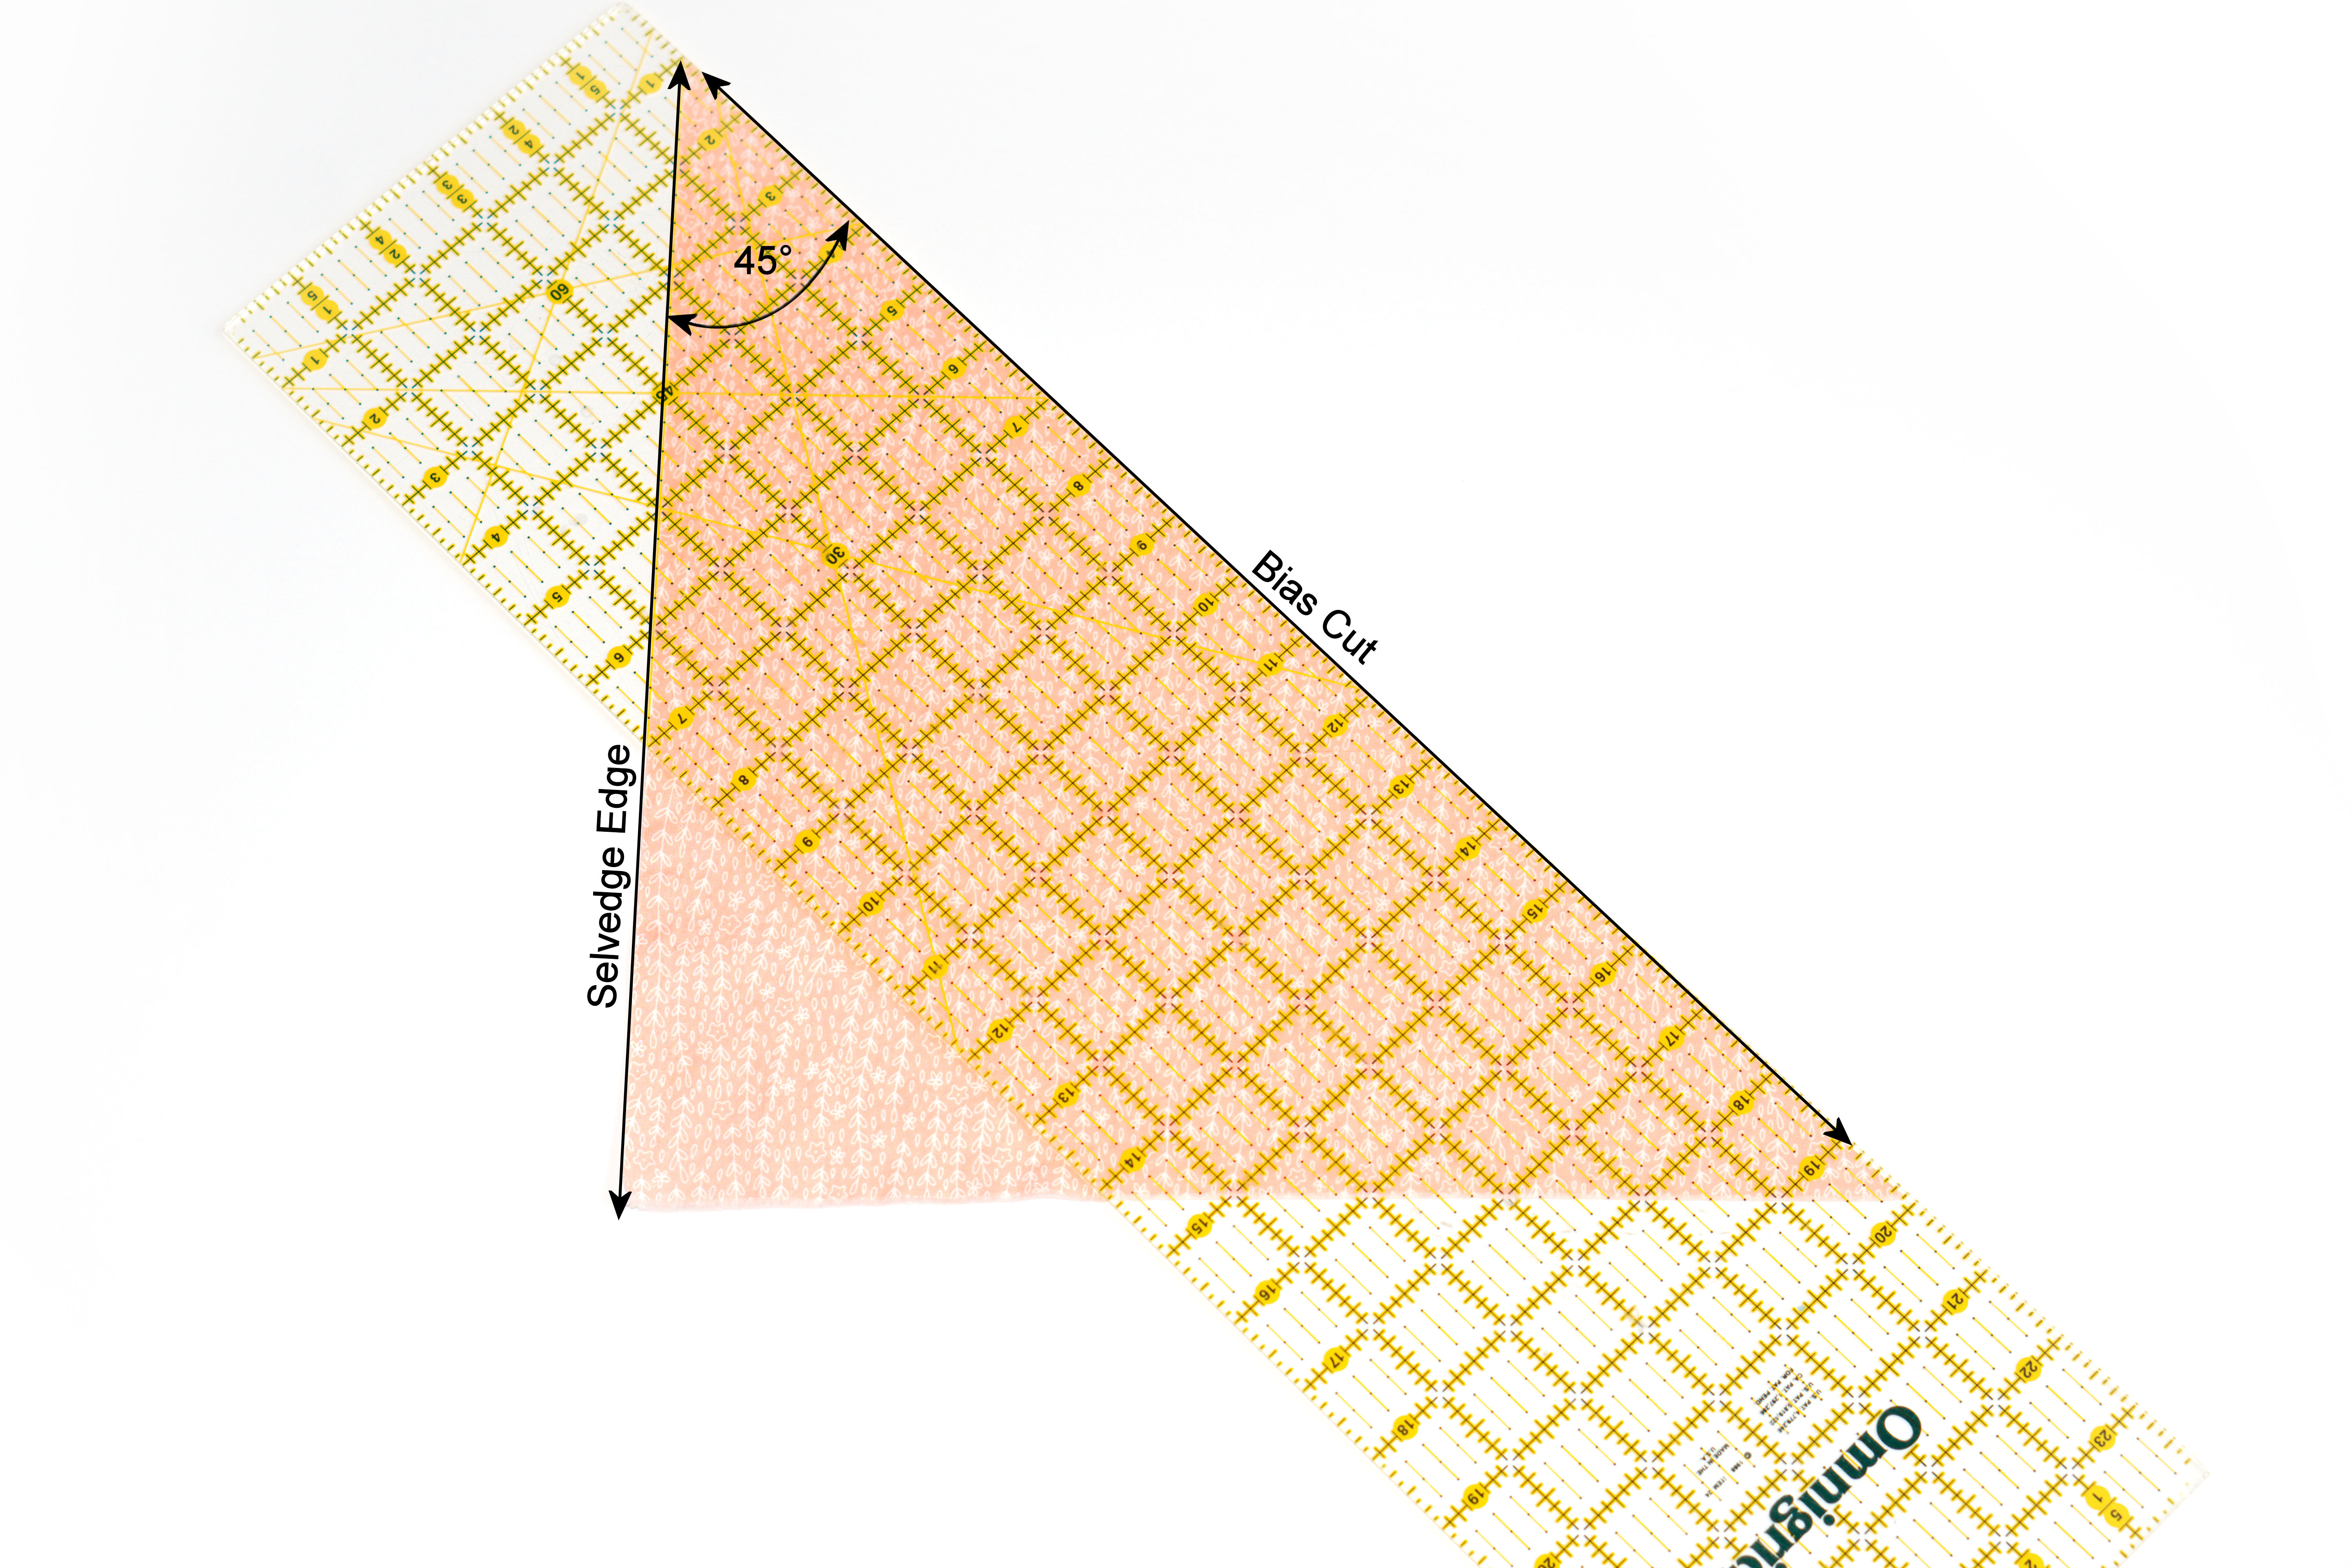
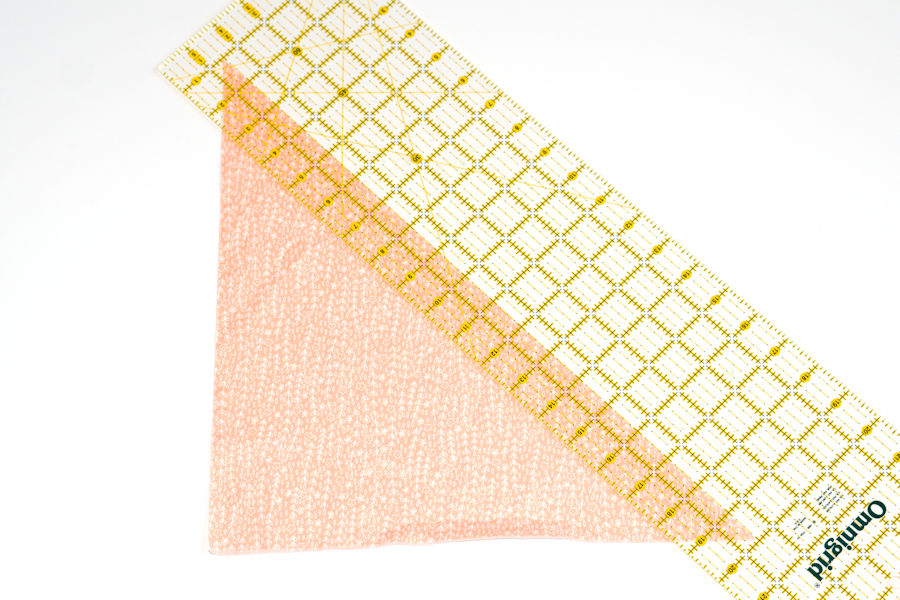
To begin, cut a section of fabric that has one edge which is at a 45 degree angle from the selvedge (or grainline).
Measure 1 1/2″ in from the bias edge of the fabric and cut along that line.
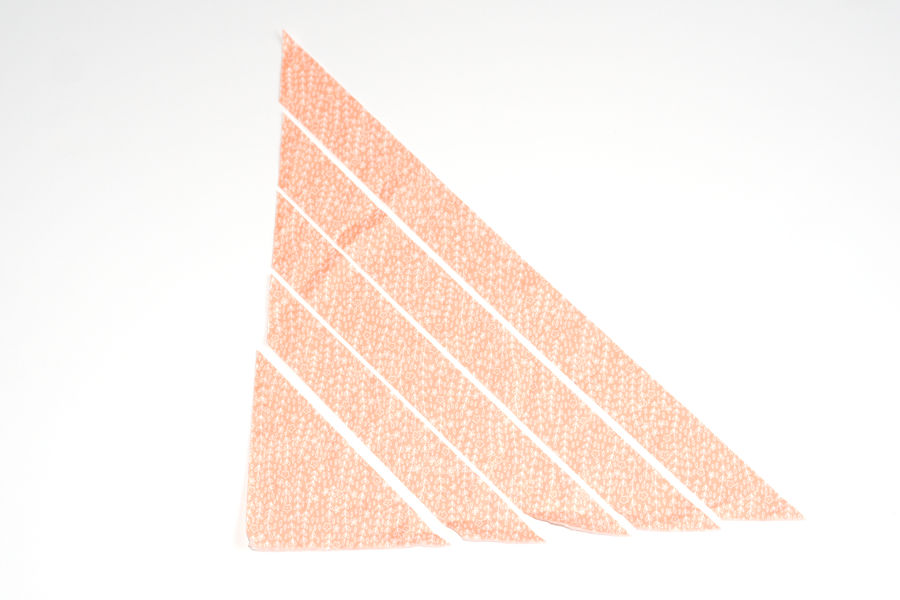
Continue measuring and cutting 1 1/2″ strips from the bias edge.
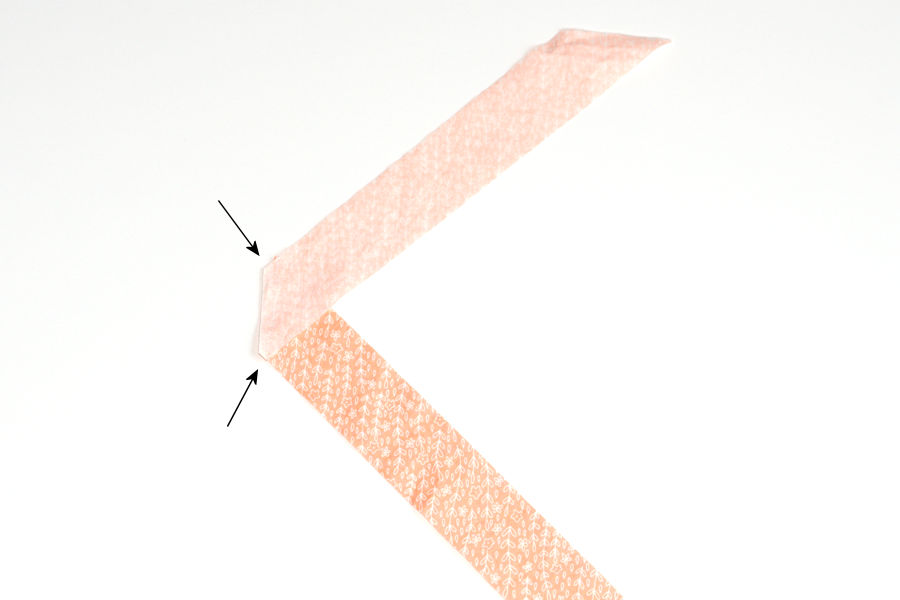
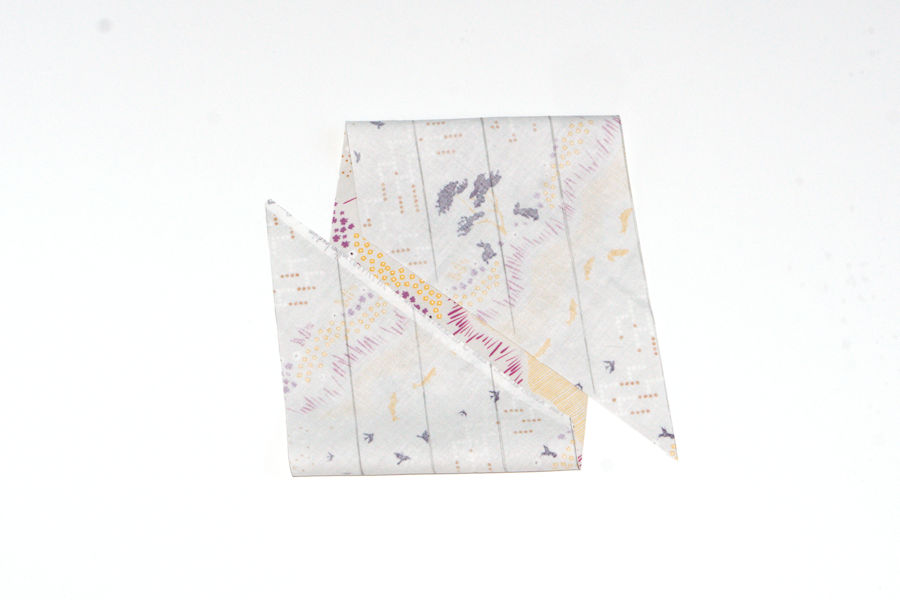
Combine these smaller bias strips into one long piece of bias tape by laying 2 strips right sides together at a 90 degree angle to each other. (The two short edges should align.)
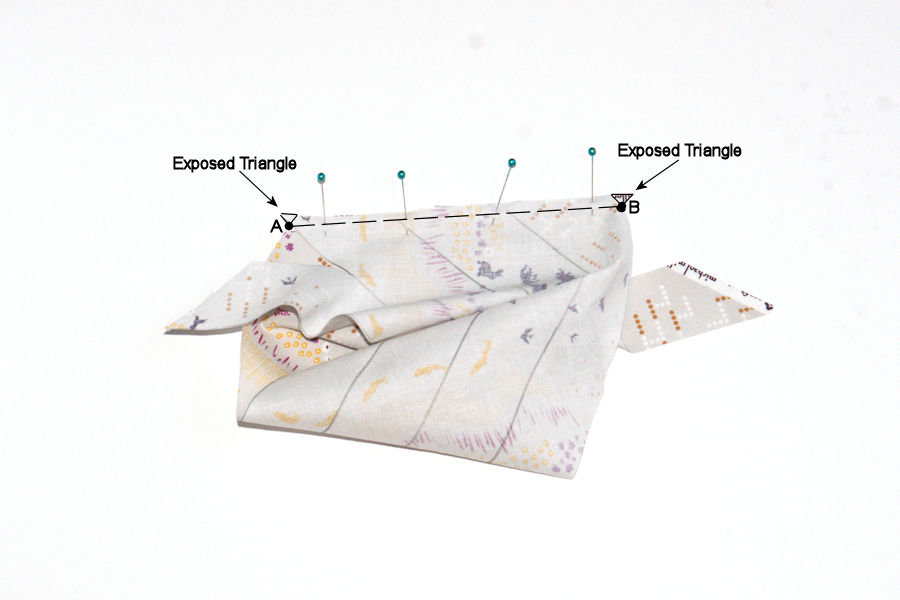
The seam allowance will be 1/4″ and the strips will need to be offset by that amount. Keeping the short edges aligned, shift the strips just slightly until a small triangle of fabric is exposed on each strip, as demonstrated in the photo below. The stitch line will be from point A to point B so the strips will be shifted until those points are 1/4″ from the short edges. Pin in place.

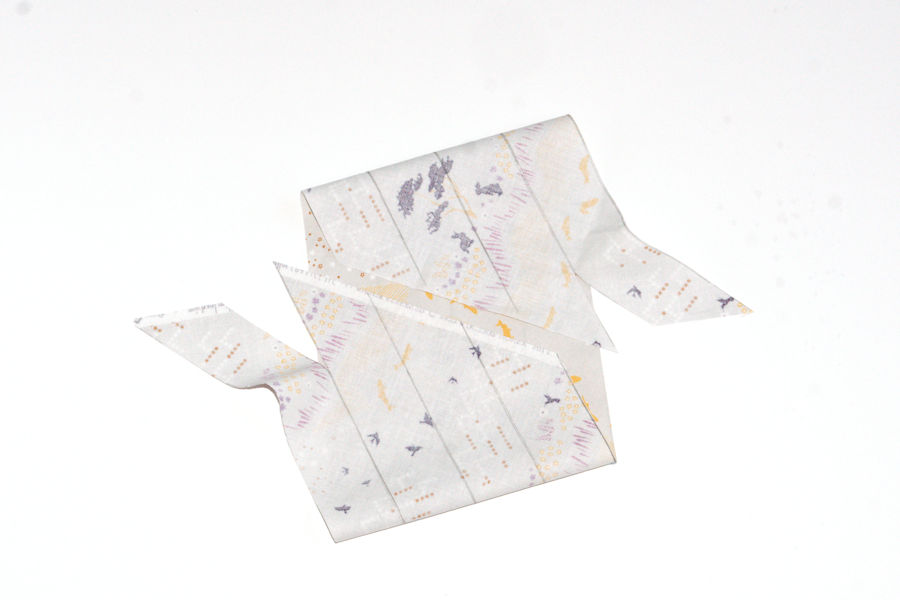
Sew the two strips together, using the exposed triangles (from the previous step) as the 1/4″ seam allowance guide.

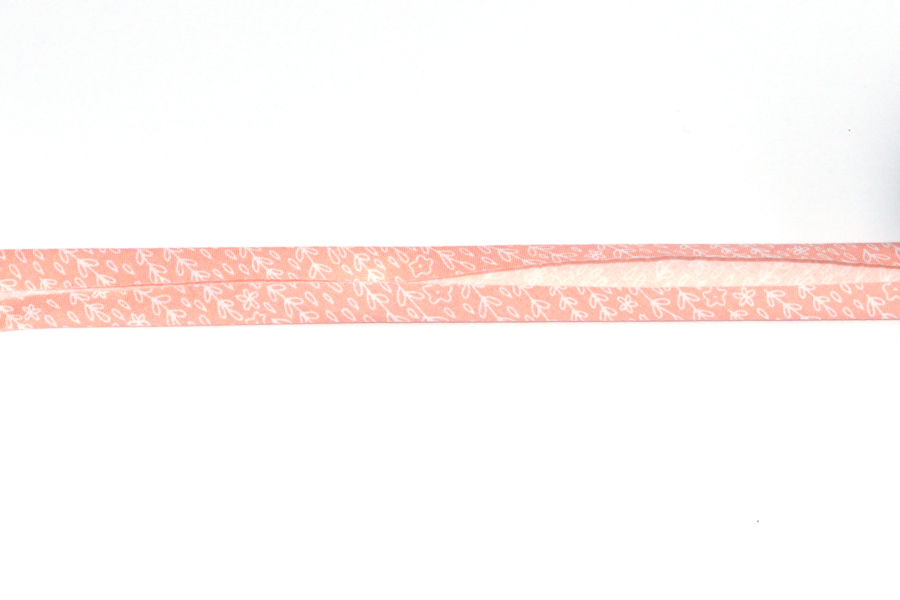
Trim off those exposed triangles, and press the bias strip open/flat. Repeat these steps until all the pieces have been combined to create the full bias tape.
Fold and press the strip in half lengthwise, with wrong sides together.

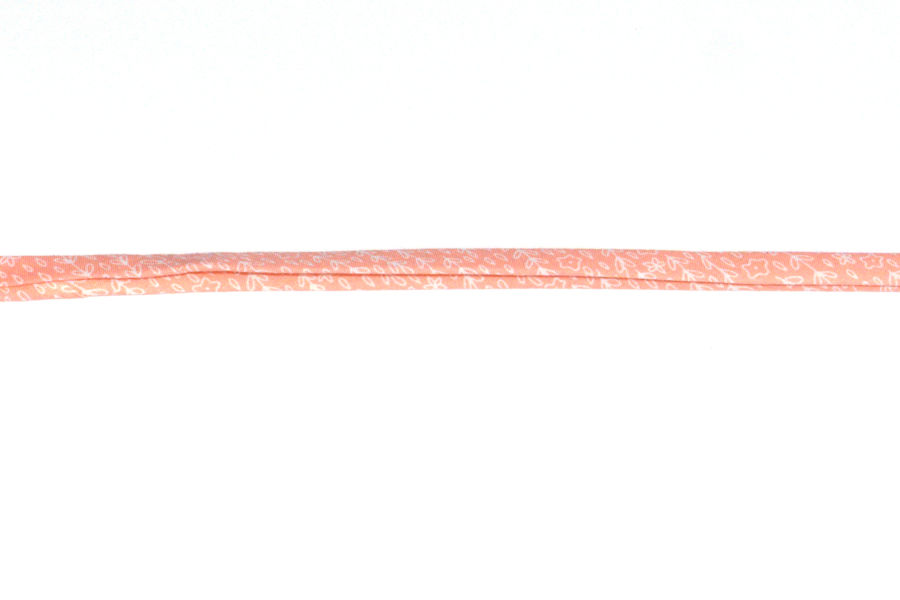
Open the middle fold and press each long raw edge in to the middle crease, wrong sides together. At this point the tape is considered to be “Single Fold Bias Tape”. If you are using it as single fold tape, you will want to give it a nice press to remove that middle crease line. To create what is called “Double Fold Bias Tape”, continue with the next step.
With the long edges still pressed towards the center, re-fold and press the whole strip along the center fold line. This is now completed double fold bias tape.
METHOD 2:
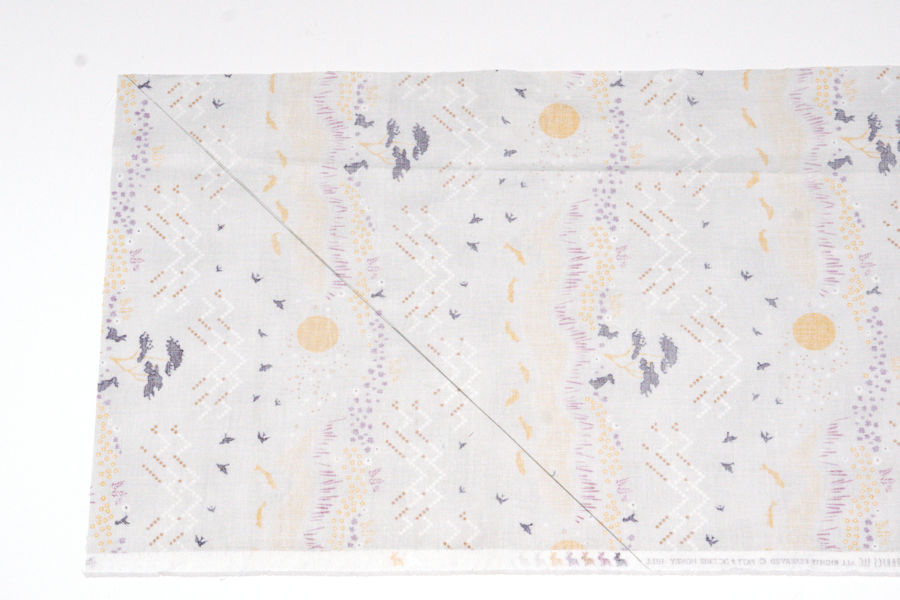
For this method, a rectangular piece of fabric is required. With the fabric facing wrong side up, draw a line connecting the top and bottom of the rectangle along the bias line. (ie – a line that runs at a 45 degree angle to the selvedge edge – or – grainline).
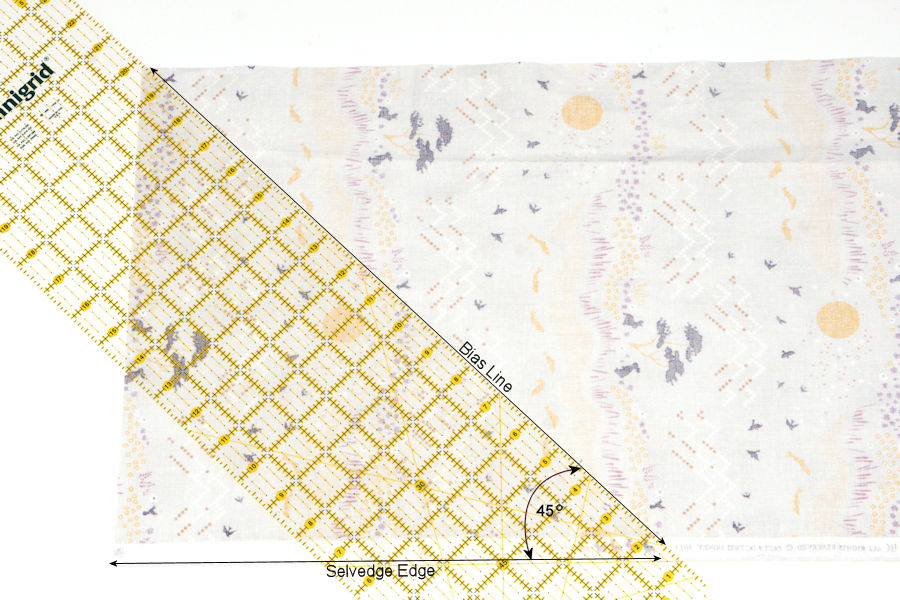
Measure over 1 1/2″ from the first bias line, and draw a second line.
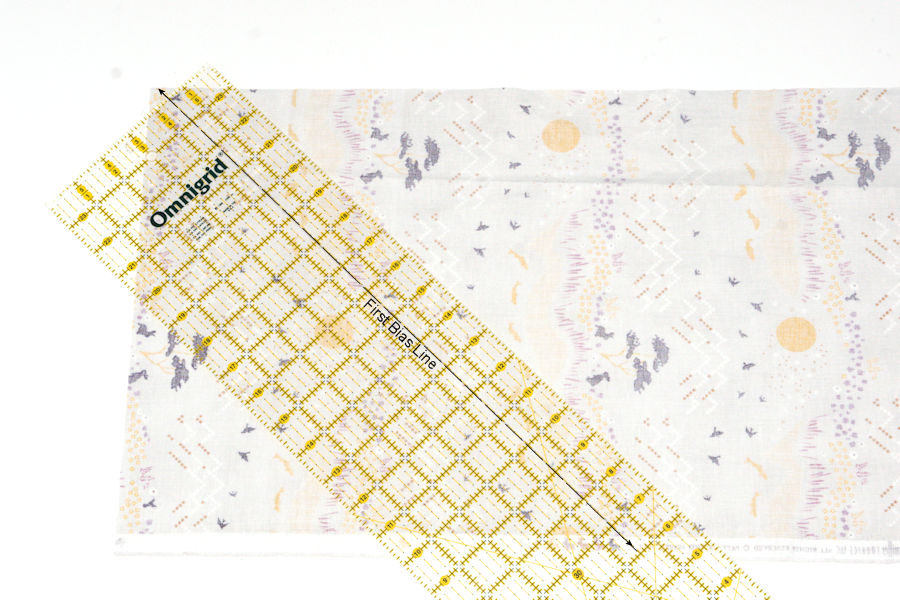
Continue measuring and drawing bias lines along the fabric.
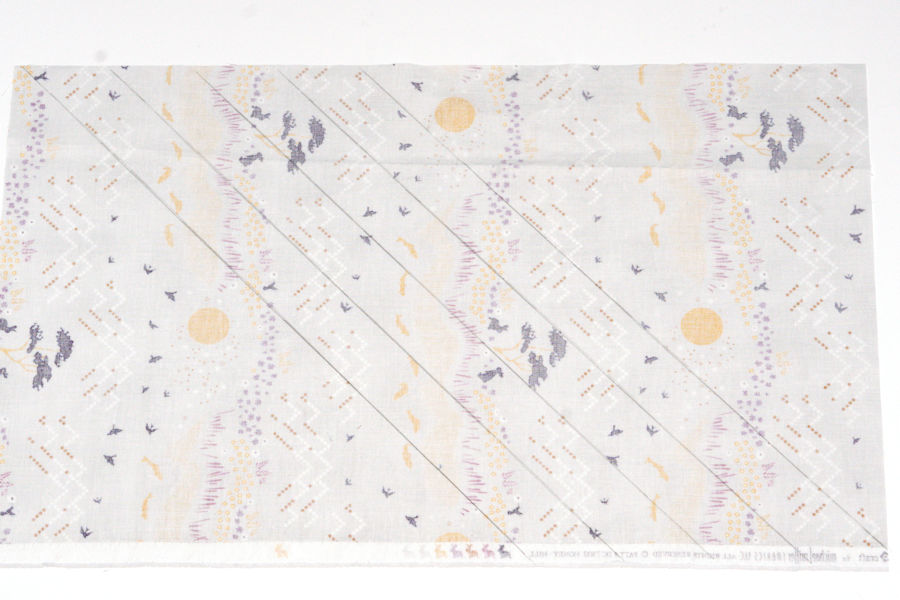
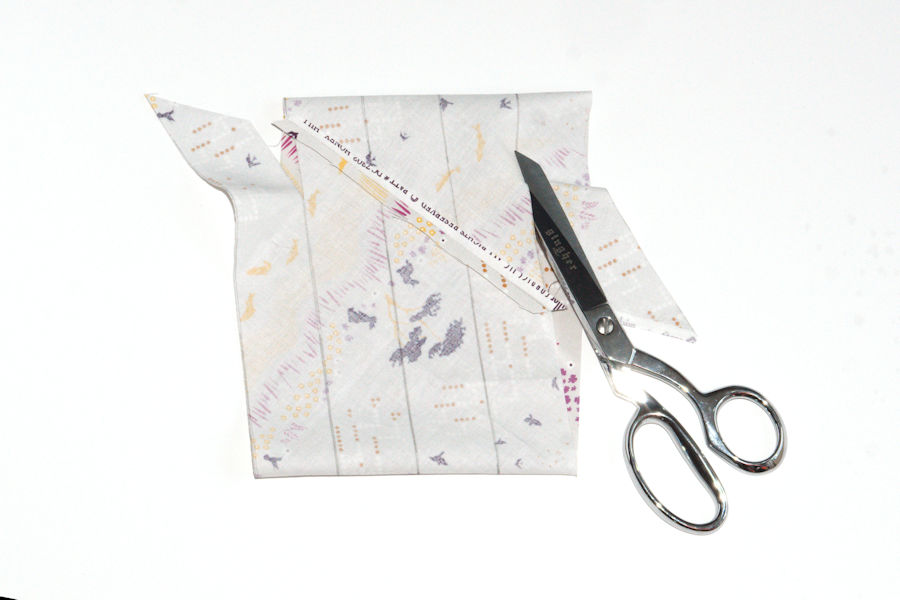
Remove the triangular sections left on each end.
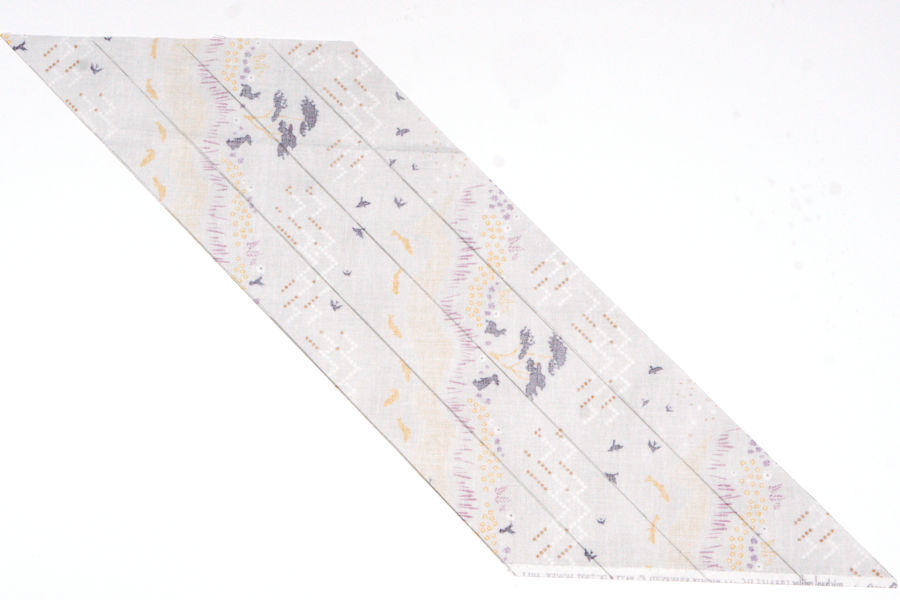
Turn the fabric right side up and fold the ends in towards each other.
Cut a few inches along the marked line on opposite edges of the fabric and move the small sections out of the way.
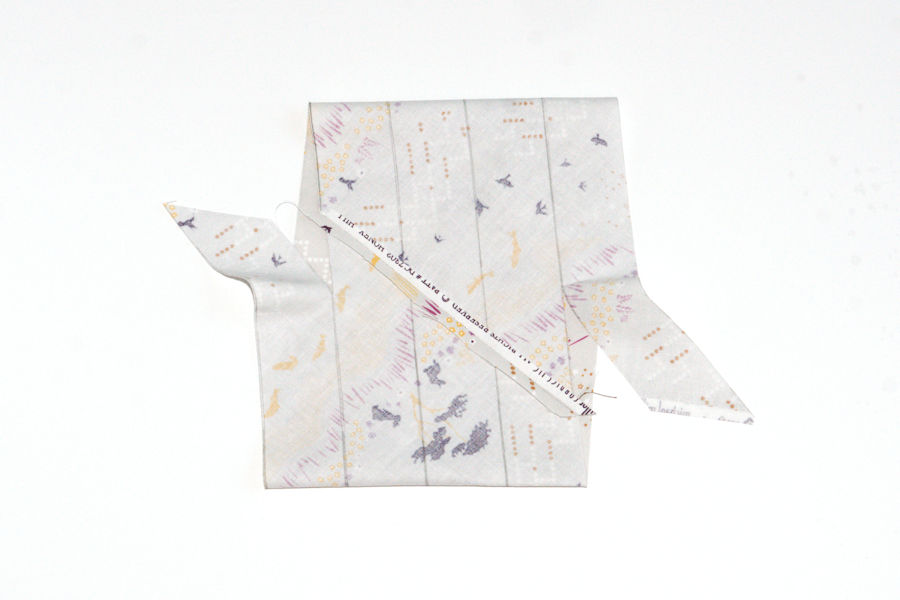
Align the remaining sections (right sides together) and pin in place. As in Method 1, the fabrics should be shifted just slightly so as to leave a small triangle of each fabric exposed. The seam (from points A to B) should end up being 1/4″ from the raw edge. Sew together.
Press seam allowance open.
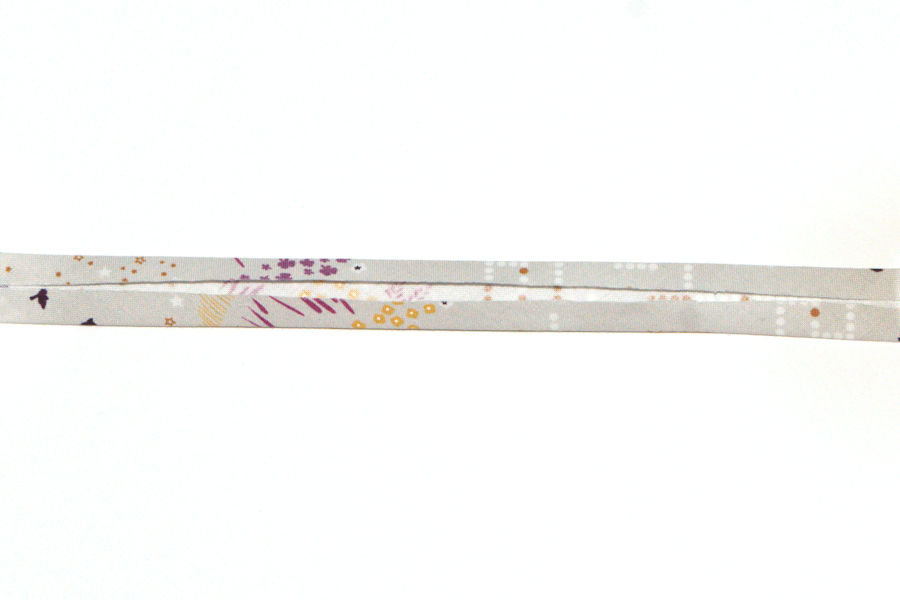
The tape is now ready to be cut into one long strip! Start at one end, where it has already begun to be separated, and continue cutting along the marked line.


Fold and press the strip in half lengthwise, with wrong sides together.

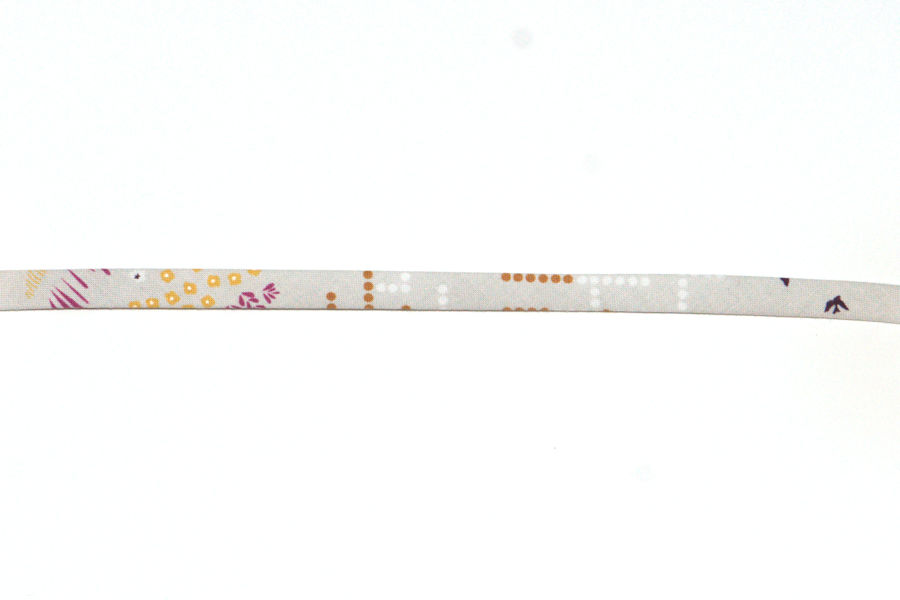
Open the middle fold and press long edges in to meet the centre crease, wrong sides together. At this point the tape is considered to be “Single Fold Bias Tape”. If you are using it as single fold tape, you will want to give it a nice press to remove that middle crease line. To create what is called “Double Fold Bias Tape”, continue with the next step.
With the long edges still pressed towards the center, re-fold and press the whole strip along the center fold line. This results in what is called “Double Fold Bias Tape”.
And there you have it! Two different methods for creating your own double or single fold bias tape!
Now, how about adding some bias tape to the bottom of a circle skirt like the Pinecone or Fireweed patterns?! It’s our favourite way to hem what is typically known as a tricky hemline to finish. Not only do we not have to fret over how to fold that curved hem nicely, we can also use coordinating fabric and create a pop of colour or nice detail that will only peak out once in awhile. This is especially beautiful on hi-lo circle skirts where you will see the inside of the skirt from certain angles.
For this we’ll be using single fold bias tape. Using single fold means that the entire bias tape will be folded into the inside of the garment. Double folded tape can also be used for a different look as it will enclose or sandwich the raw edge of the skirt showing the bias tape on both the right and wrong sides of the skirt.

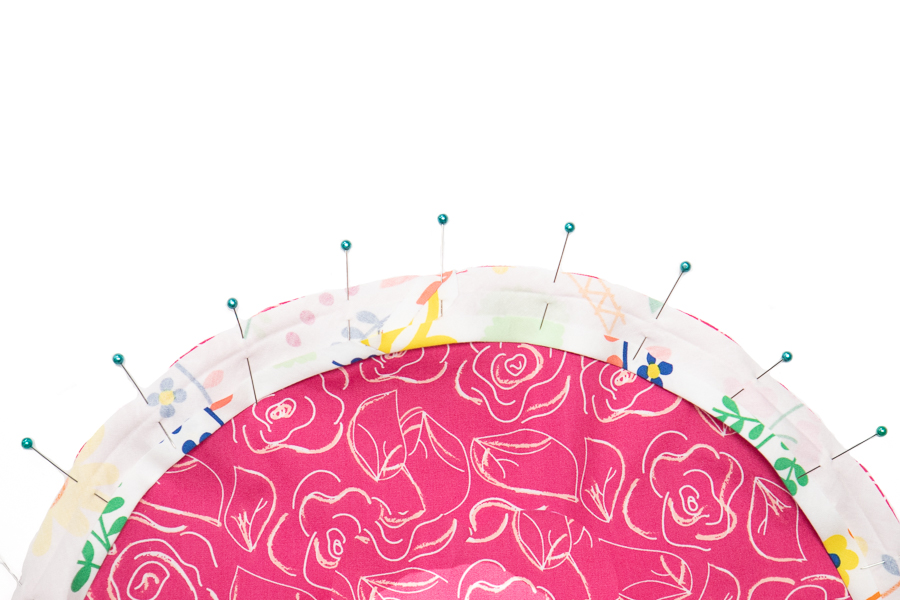
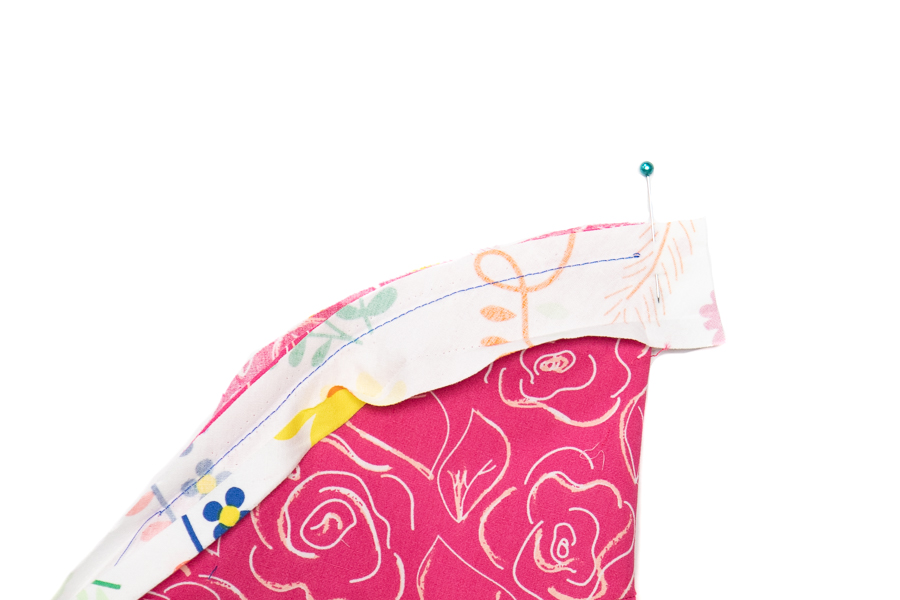
Begin by opening up your bias tape and pinning it RST to the hem of the circle skirt. Pin all the way around, pulling slightly on the bias tape as you go. Some people prefer to just sew it on instead of pinning first. (Just make sure you have enough bias tape before you start.) Choose the method you are comfortable with, however, be sure to start sewing/pinning approx. 2″ from the end of bias tape.
Your bias tape has 2 creases that were created when making it. Use the crease closest to the outside edge as a guide for where to sew. Sew around the circle along the crease and stop sewing before you reach your starting point leaving a 1-1/2″ gap. Trim off excess bias tape approx. 2″ from where you stopped sewing.
Fold the skirt in half WST at the 1 1/2″ section that was left open. Take the extra lengths of bias tape and match them RST. Mark on the bias tape the exact spot of the folded edge of the skirt. Trim the ends of the bias tape 3/8″ from your marked spot perpendicular to the long edge of bias tape.
Push the skirt fabric out of the way and sew the short ends of the bias tape together at the marked location and perpendicular to the long edge of bias tape.

Lay the skirt right side up and press the new seam on the bias tape open. Sew to close the open section.
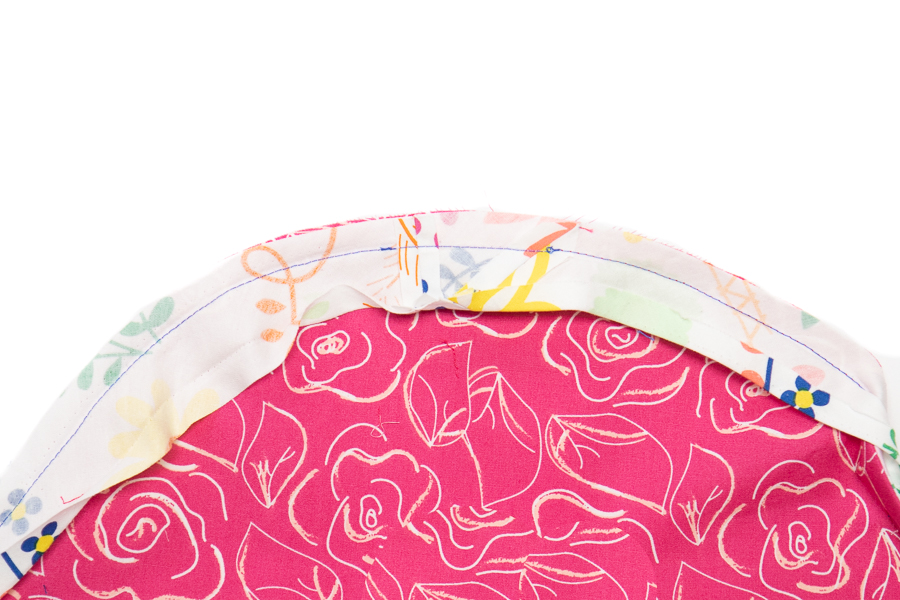
Fold the opposite edge of the bias tape over on the crease that is further to the inside of the circle. Then fold the entire bias tape over to the wrong side of skirt enclosing all raw edges. Press well and topstitch 1/8″ from the inside folded edge.
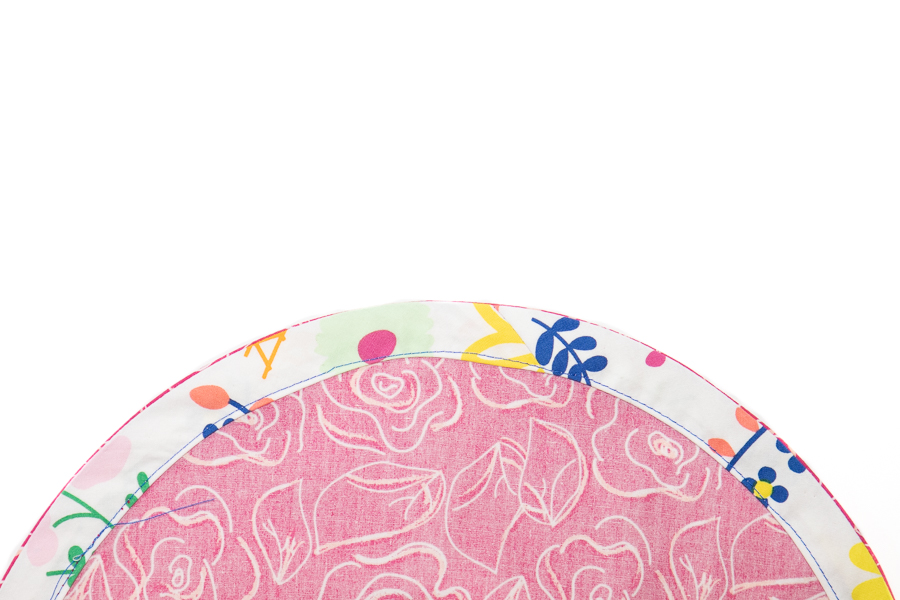
You can also use this method to apply the bias tape to the outside of your skirt, if you like. Just sew your bias tape to the wrong side of fabric and it will fold over to the right side when completed.
We hope this helps at least a little and perhaps we’ll see some of your bias tape circle skirts in our Sofiona Designs fan group!

2 thoughts on “Preparing Bias Tape”