

It’s no surprise to say that everyone comes in a different shape/size. One of the benefits of sewing your own, or your kids, clothes is that you can customize the pattern to your exact requirements! Today we’re going to show you how to use a pattern’s lengthen/shorten line to obtain the length you need.
In the example we’re using today, the lengthen/shorten line comes with specific instructions to add or remove 3/4″ for each size you are increasing or decreasing the pattern length (not every pattern will include specifics like this).
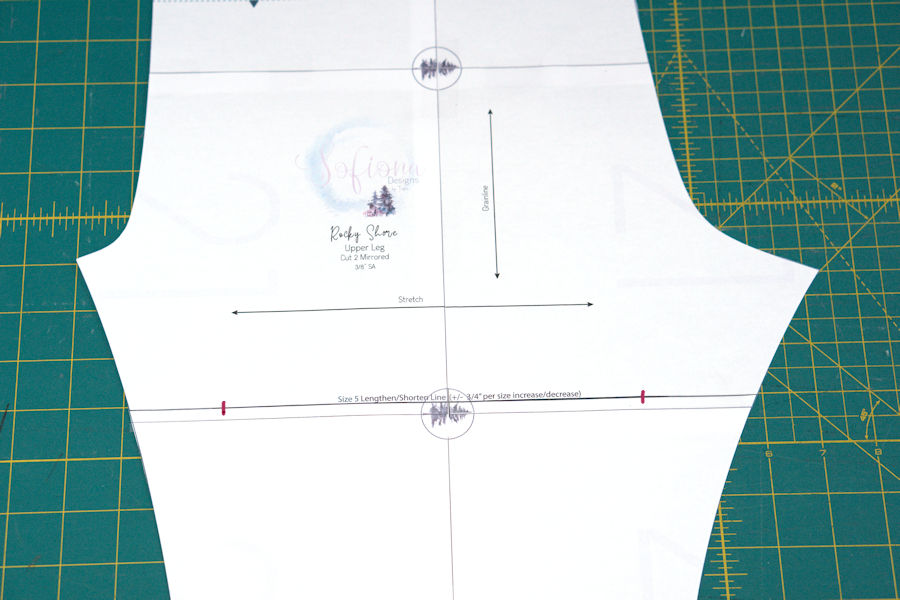
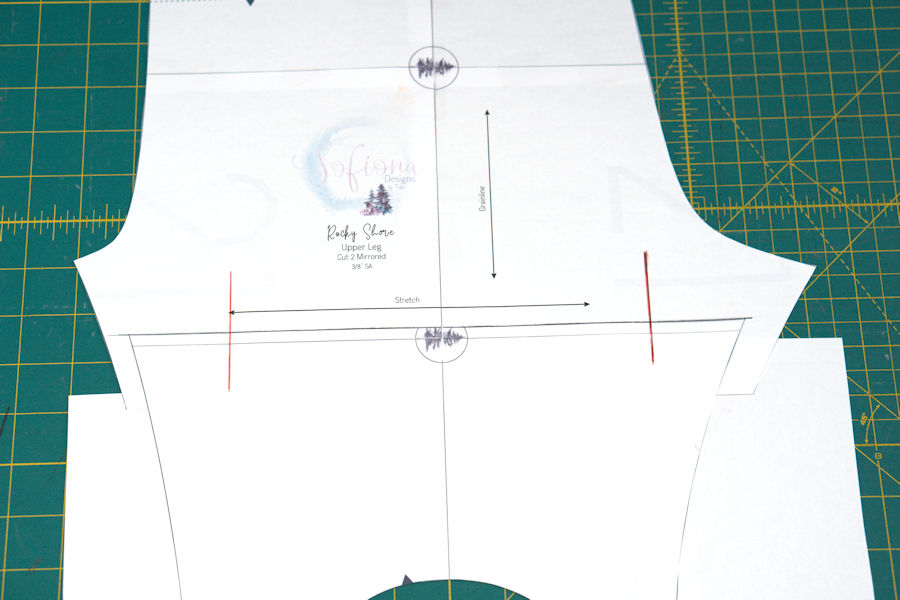
LENGTHENING: Our model’s measurements require that we cut a size 5 width, but a size 7 length. To start, we’ve cut out the size 5 pattern piece. We’ll add length in the steps below.
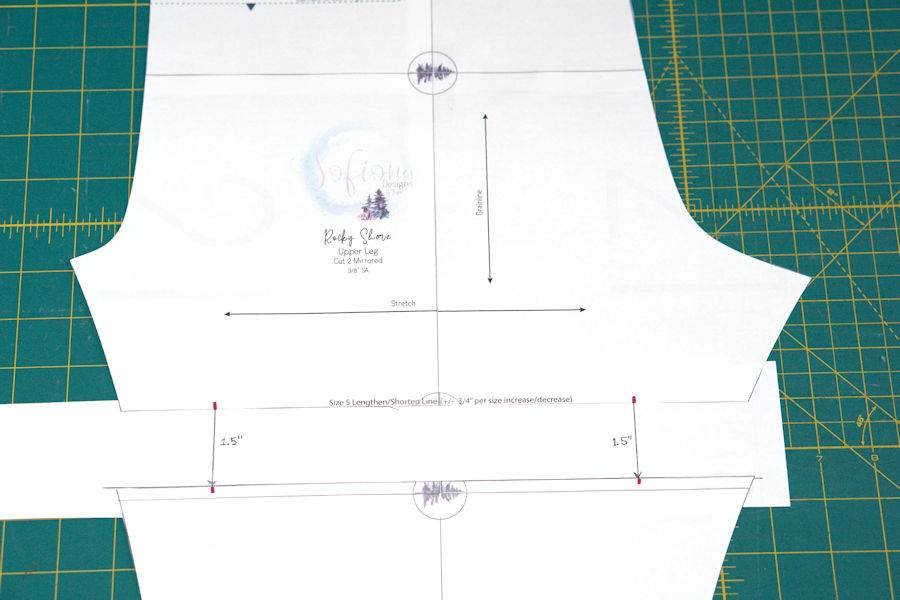
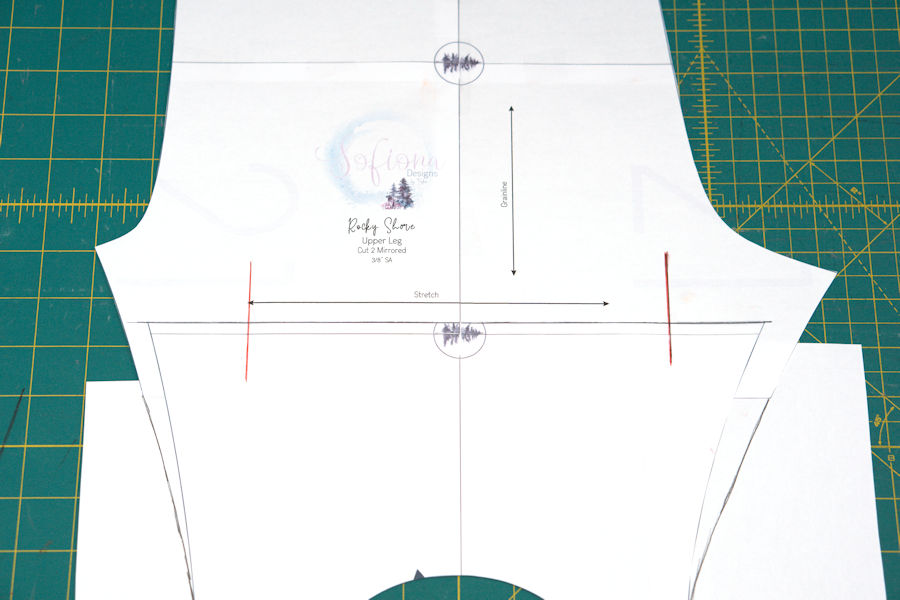
- Begin by drawing 2 small lines that cross over the lengthen/shorten line, running perpendicular to it. (drawn in pink below)
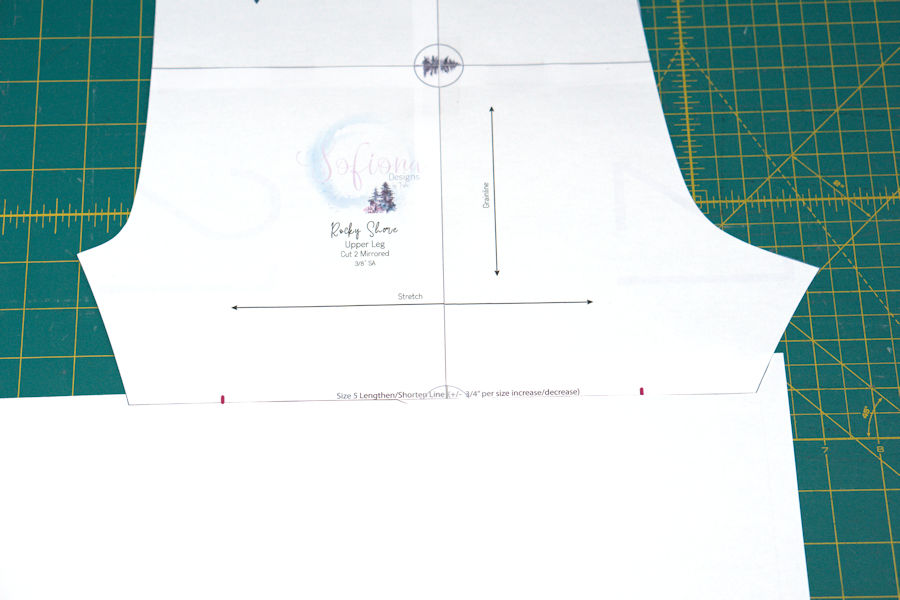
2. Cut along the lengthen/shorten line, separating the 2 sections of the pattern piece.

3. Tape a piece of scrap paper under the upper pattern piece.
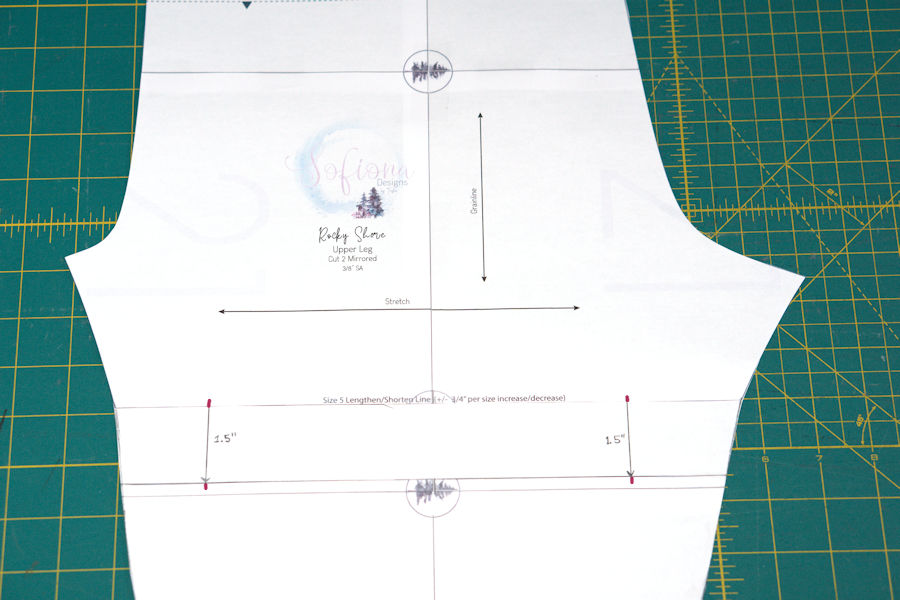
4. Determine how much extra length is needed. In our example we are increasing the length by 2 sizes (from a size 5 to a size 7) which requires an extra 1.5″ of length. Measure down the required amount from the top pattern piece; extending the markings you made in step 1 by that amount. Draw a line parallel to the lengthen/shorten line at these points.
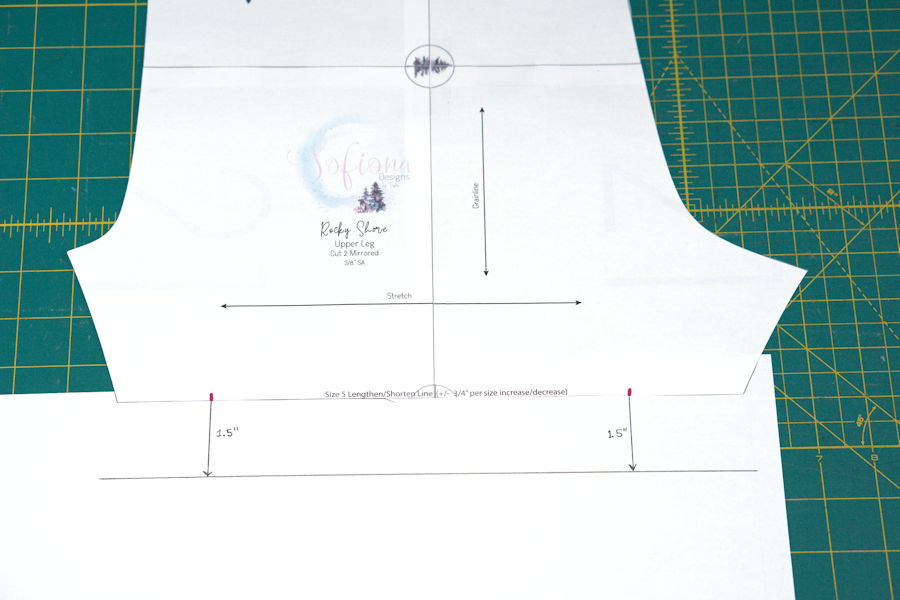
5. Leaving about 1/2″ below the new line you drew, trim off any extra paper.
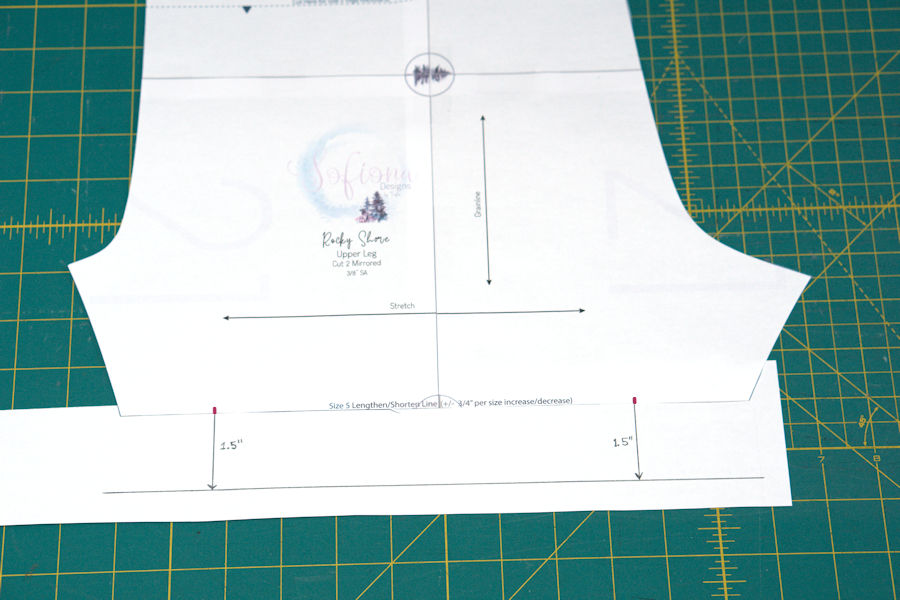
6. Line up the top of the lower pattern piece with the line drawn in step 4. Make sure the (pink) markings from step 1 also align with the extension lines drawn in step 4. Tape the lower pattern piece in place.
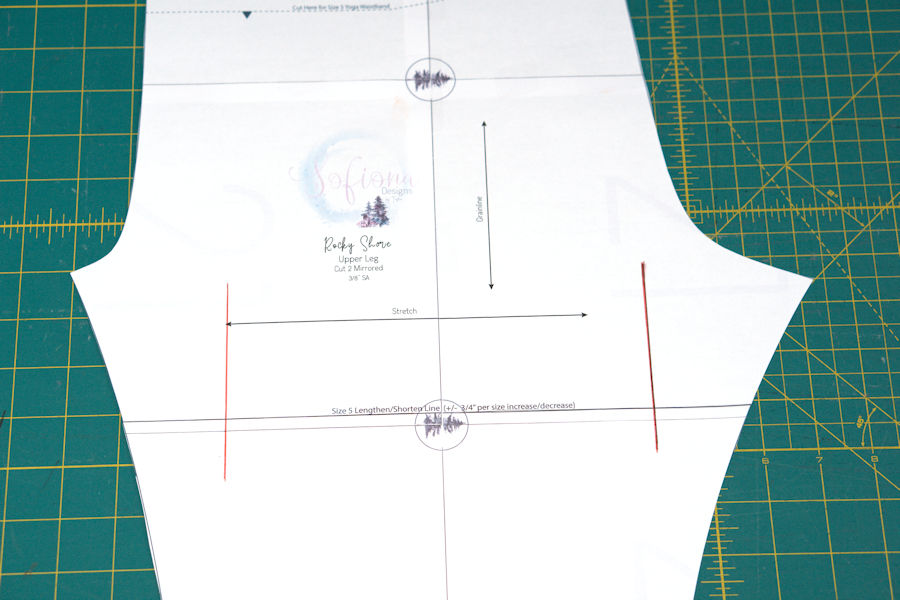
7. The only thing left to do is blend the upper and lower pattern pieces together. Draw a line to connect the two pieces. In some cases a straight line can be used, but in cases where the pattern is lengthening along a curved line, it may be necessary to blend and trim a bit off the original pattern pieces in order to maintain the original curve (as we’ve done below).

8. Cut out the new, lengthened pattern piece. It’s ready to use!
SHORTENING:
What if, instead of lengthening the pattern by 2 sizes, we wanted to shorten it by 2 sizes? The method is pretty similar.
- In this case draw 2 markings that perpendicularly cross over the lengthen/shorten line. Make sure to extend them at least a few inches above the line.
2. Cut the pattern piece along the lengthen/shorten line.

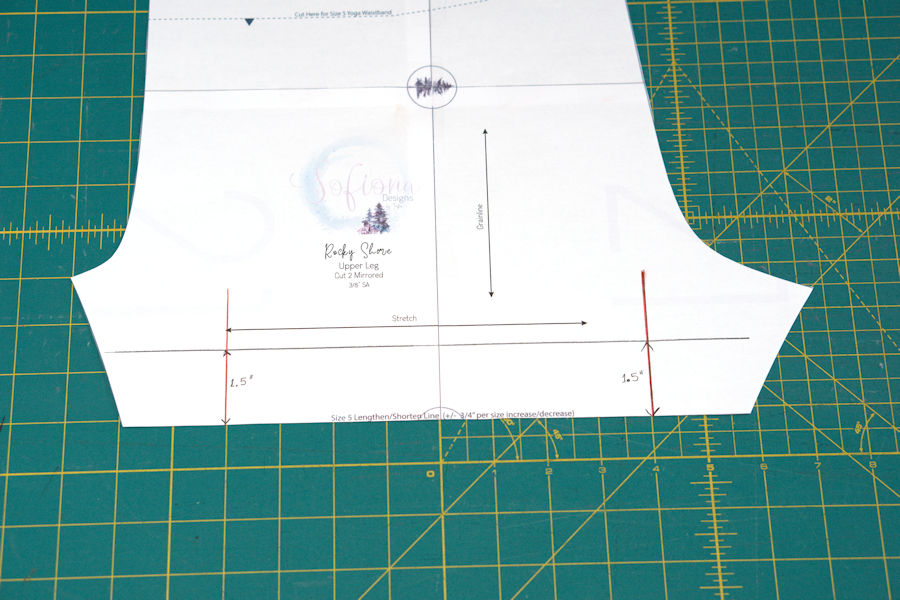
3. Determine how much less length is needed. In our example we are decreasing the length by 2 sizes (from a size 5 to a size 3) which requires 1.5″ less length. Measure up the required amount from the bottom of the pattern piece and make a mark. Draw a line parallel to the lengthen/shorten line at these points.
4. Align the top of the lower pattern piece with the line drawn in step 3. Make sure to also line up the perpendicular markings from step 1. Tape together.

5. You will notice here that there’s a significant jog in the edges. Because we are only shortening, and not wanting to change width, you will need to blend down starting from the widest part. Scrap paper can be taped in behind the pattern pieces in order to draw a new line.
6. Blend the 2 pattern pieces together, maintaining the original curve as much as possible.
7. Cut out the new pattern piece. It is ready to use!


One thought on “Using a Patterns’ Lengthen/Shorten line”