
It’s pattern release week again and that means BUSY!!! The kind of busy that means my kids eat a few more “low key” suppers, if you know what I mean. But it’s always so exciting!! Trish and I have likened new patterns to having babies. It’s all painful till you see the beauty and soon you forget how much it hurt to get there! And you do it again! Some more than others…
A special thanks to Prairie Love Knits, a fellow Canadian company that gave us a great discount so that we could make up a lot of great Moss looks AND Narwhal swimsuits! We’ll be sharing our pics over in their fan group and we highly encourage you to check this small business out. They have a great selection of knits and Sharon also creates her own custom fabric designs that I think match the Sofiona look so well. We’ve been honoured to get to know her.
This post is meant to give you a heads up on things we found in testing, to tell you why this is categorized as “Intermediate”, and I’ve also added a short tutorial on how to add some visual interest to the hood. But first, let me introduce this pattern to you!
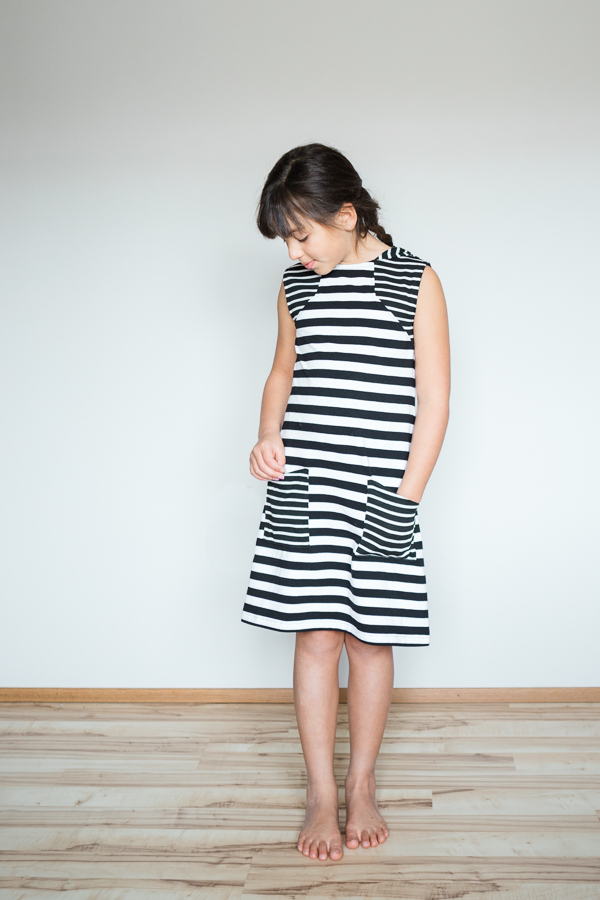
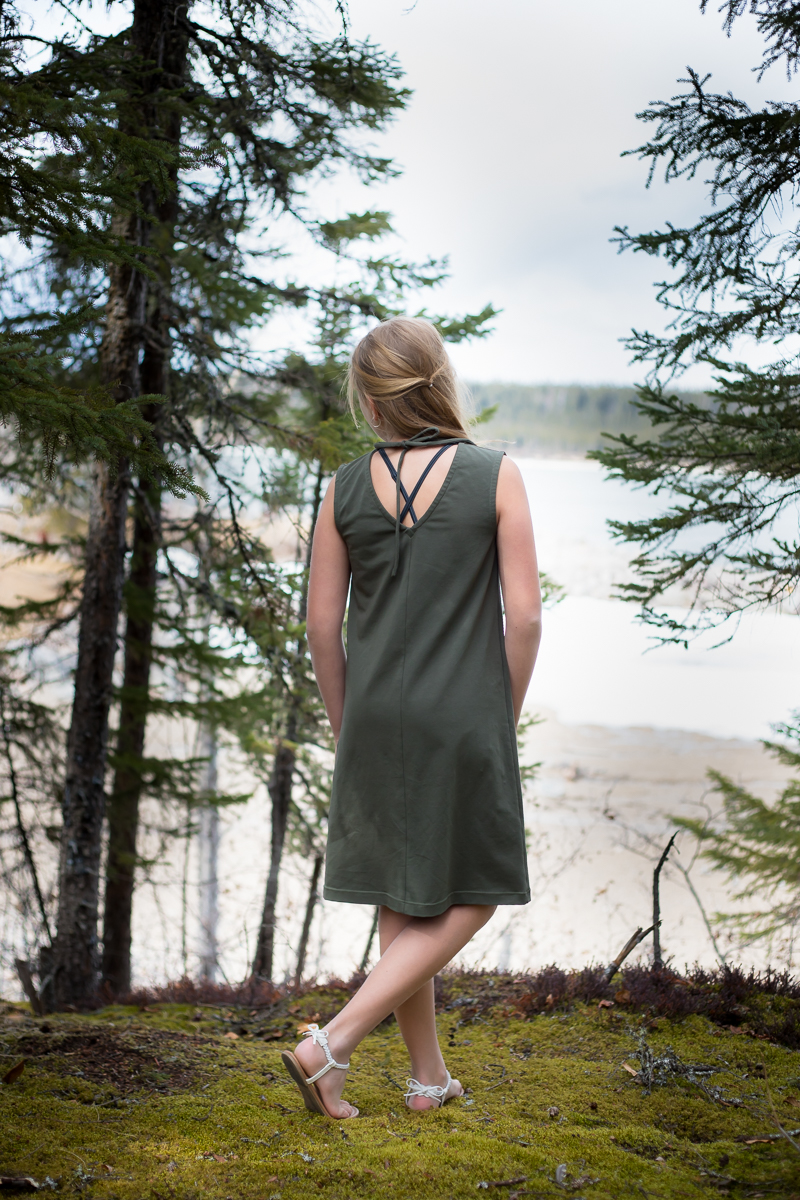
Moss is a knit pattern with the back cowl hood and thin ties being the excitement in the back and cool, angular side panels that add interest in the front. The optional pockets mimic the lines on the side panels. This pattern includes top, knee and maxi lengths and I love each length for different reasons.
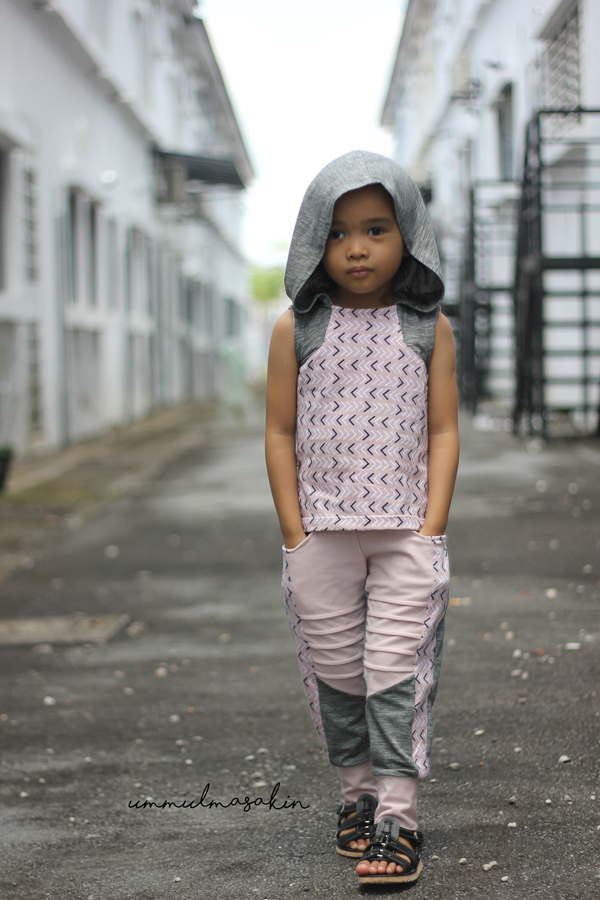
The top length was the surprise for me in the pattern. It wasn’t part of my original vision, but the day I decided to try making one in the top length I realized just how amazing it looks with our Railway joggers!!! Totally unintentional, people! In fact, the joggers are Trish’s design and Moss is mine which goes to show you, we kinda got a good partnership going on.
The knee length is more what I imagine for the swim cover aspect of this pattern. An easy dress to throw over the suit while walking from the campsite to the beach or to throw over the swimsuit when going for lunch at the resort. Whichever kind of holidayer you are.
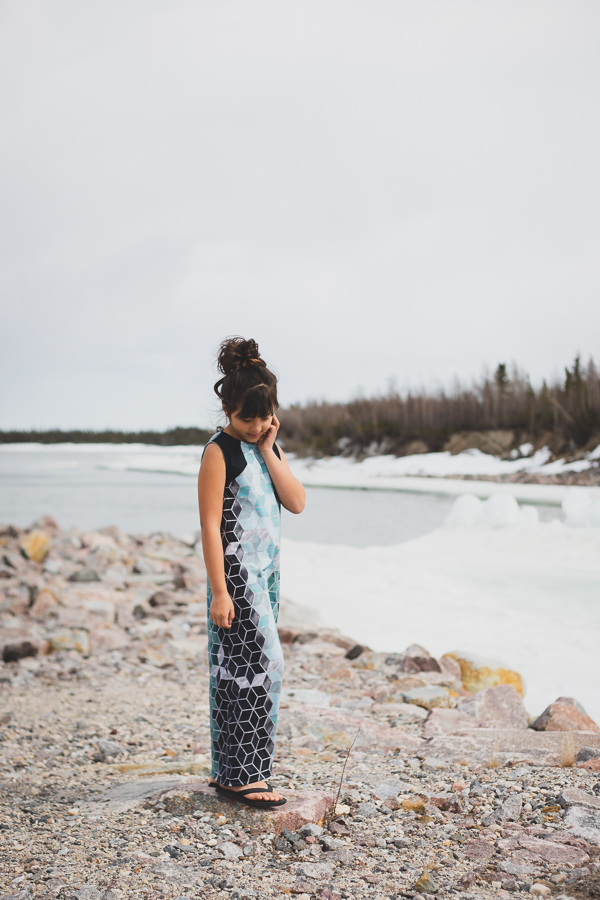
The maxi length is where my original vision lay. I love a good maxi dress and with this A-line cut, it’s the kind that doesn’t take loads of fabric either.
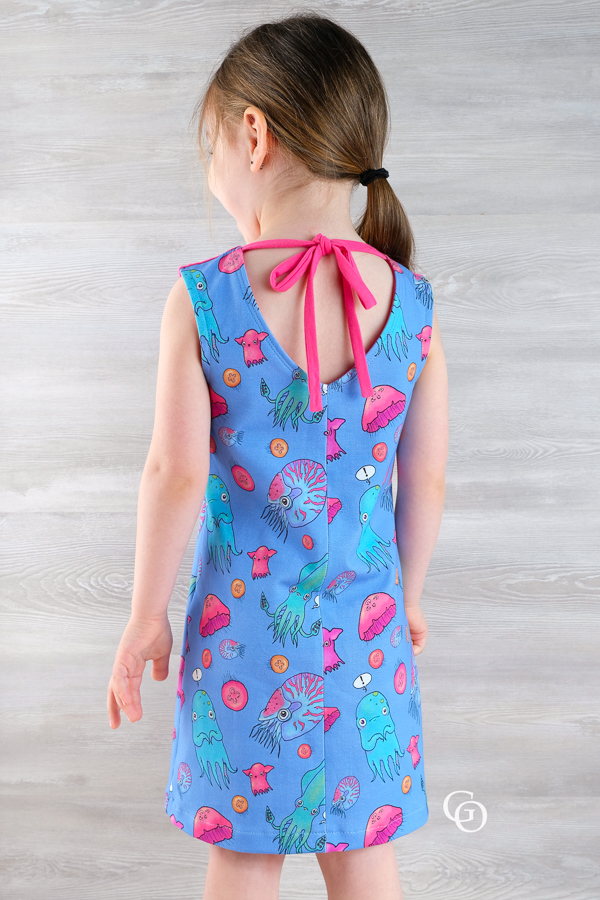
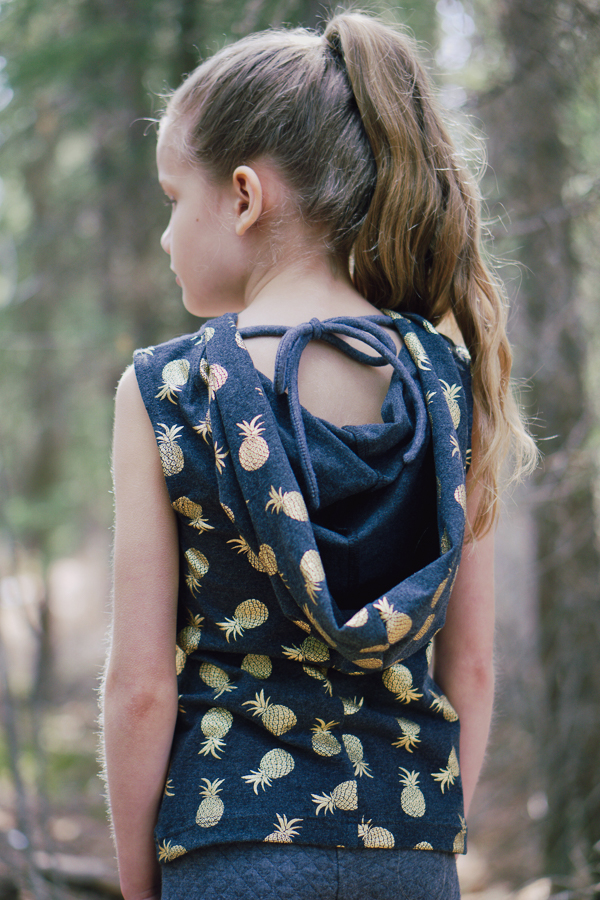
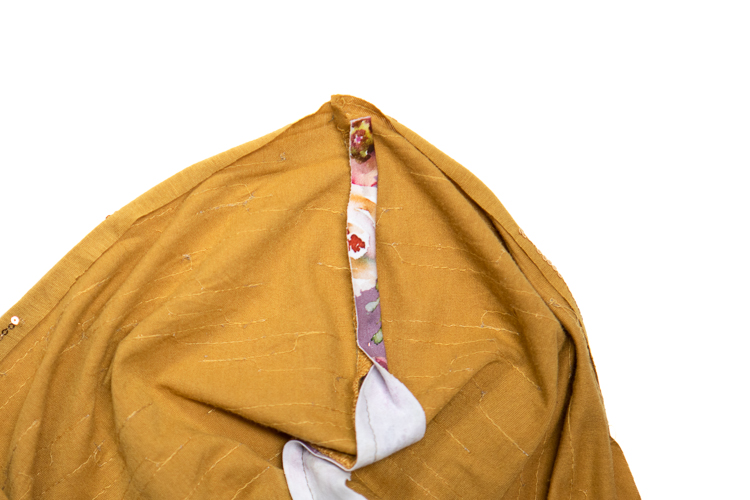
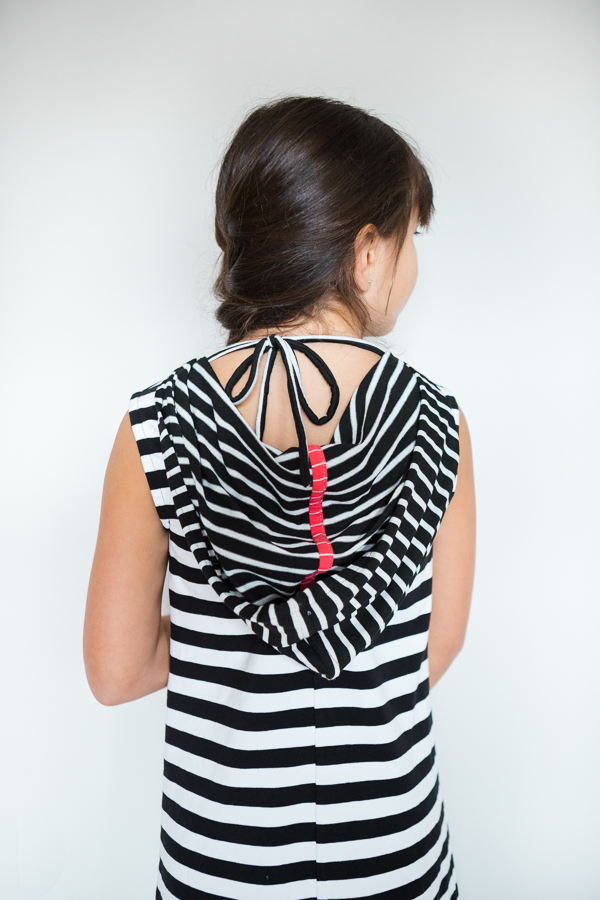
The hood though!!!! Who guessed that was my favourite part of this pattern? It took a few tries, but I had this vision of a cowl-like hood and I was determined to make it work. It is for this hood that the pattern is categorized as “Intermediate”. A little extra care is needed to achieve a nice V in the back, but it’s, OH, so worth it!
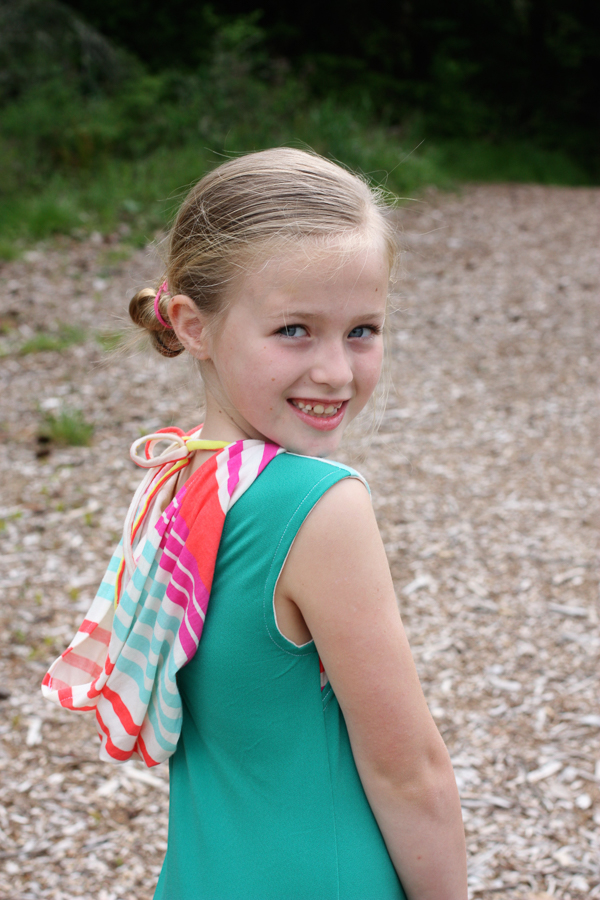
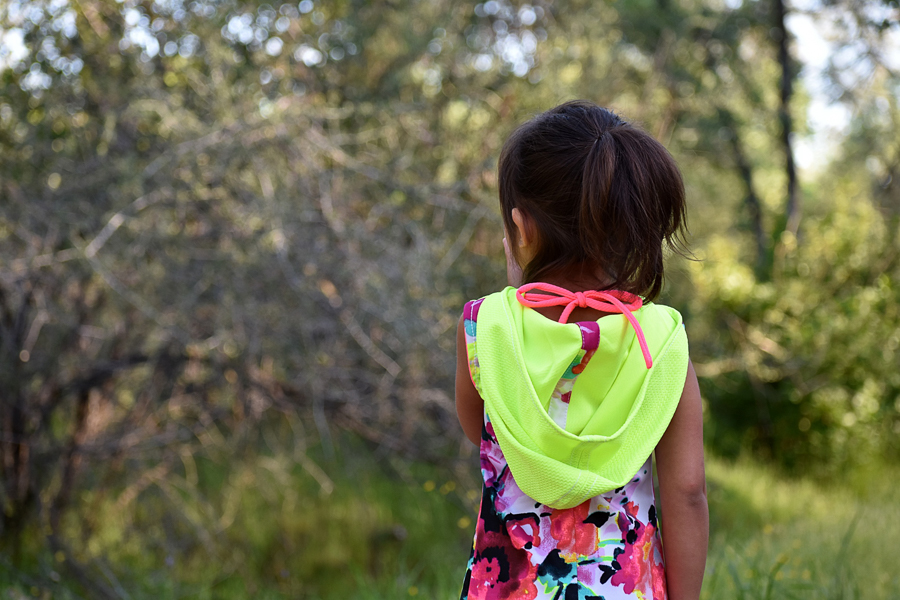
Here’s a little tip for the ties. Quite a few testers had this issue the first time around. Can you see the difference in these next two pictures?


Drag lines. These are simply due to the ties being tied a bit too tight. If you notice this happening, loosen off those ties. You want those shoulders covered just a bit and this is designed to extend over the shoulders slightly. Protection from the sun if you’re using this as a swim cover.

This would be a good time to chat about the neckline and armscye finishings. Every pattern has that one (minimum) thing that made us a bit crazy. (Except for the Arctic Fox. That one came together pretty well.) During our testing here, we, once again, found out how “fun” bindings and facings can be. While we do our best to find the best middle ground for the cut chart measurements, there is always room for adjustment based on the different knit fabrics. Higher recovery fabrics may need a bit more length so they don’t pull in and bunch. Looser/lighter knits may need less length or the arms/neckline might gape a bit.

Then we have actual pinning and sewing techniques to think about. Like keep your stitch length longer when topstitching. Or when it comes to any curves in the garment, specifically the deepest curve of an armscye, I make sure I feed it into the machine on a curve and NOT holding the fabric straight out in front of the needle which will cause the topstitching row to be a bit too short and the armscye to stick out a bit extra.

It should be clearly noted that one should NOT feel bad about needing to learn the techniques of getting pretty bindings/facings. Yes, some of you are naturals or you’ve had your practice time, but a lot of us are still learning! Little things matter and it’s worth it to take the time to slow down for those armscyes and necklines.
Oh! And pressing your seams! Isaac Mizrahi was seen on Project Runway a few weeks ago, saying that if you want your clothes not to look “homemade”, always press your seams! It’s like he read my mind.
A couple of our testers suggested the idea of under stitching the neckline and arm facings. WOW!!! What a great tip! It’s an extra step, yes, but I will always under stitch now. It was the first time I was able to topstitch with confidence without even checking to see if I was catching the edge of the facing underneath. I couldn’t believe how neat a finish it gave and how nicely the facings folded over. I highly recommend not skipping that step!
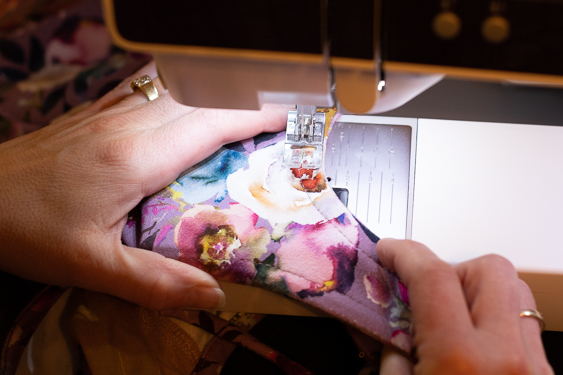
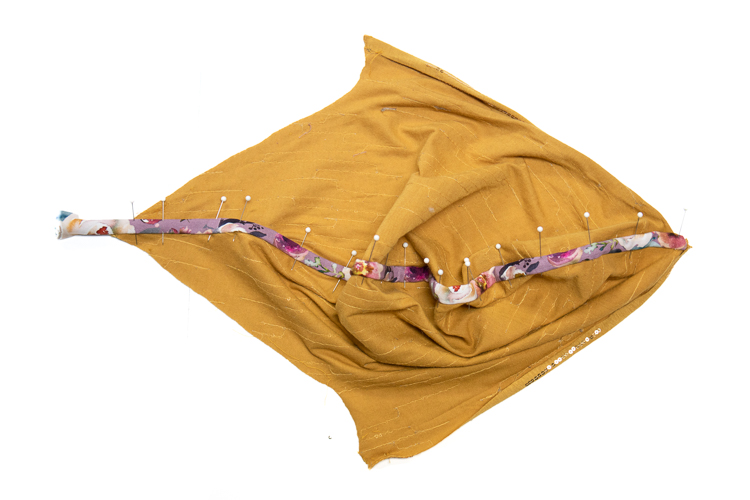
Have you noticed that some of the Moss hoods have a fun detail strip on the inside? Well, that is not included in the pattern, but I thought I’d show you quickly how you can add some visual interest to the inside of the hood. You can do this with some ribbon or twill tape as well, but this is how to accomplish the look with another fabric.
You’ll need a strip of coordinating fabric at 1 1/4″ wide. This can be a knit or a woven with nice drape. You won’t want anything too stiff.
Measure the outside curved edge of the hood to see how long a piece you will need.
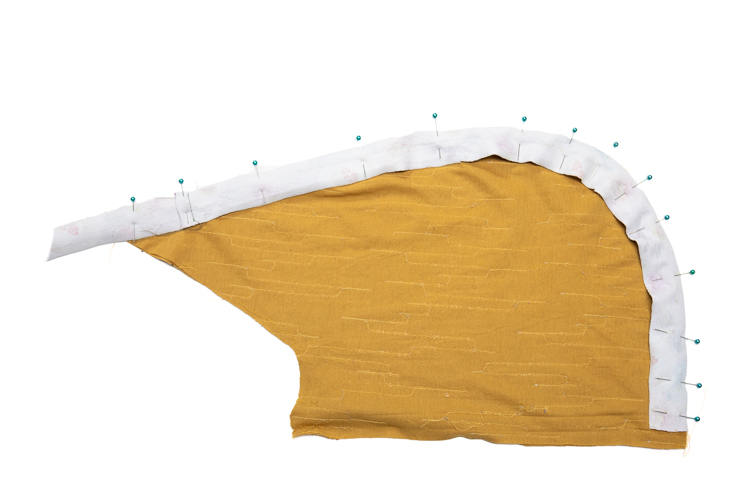
When pinning the hood pieces RST, take the fabric strip and pin it, right side down along the outside curved edge of hood, aligning the raw edges. Begin pinning approx. 1/2″ from the top edge of hood and ending a bit past the bottom V. Sew/serge the seam.
Fold the opposite edge of the decorative strip over the SA, enclosing the SA.
Turn the enclosed seam over again and pin making sure the hood is laying flat underneath and is not folded.
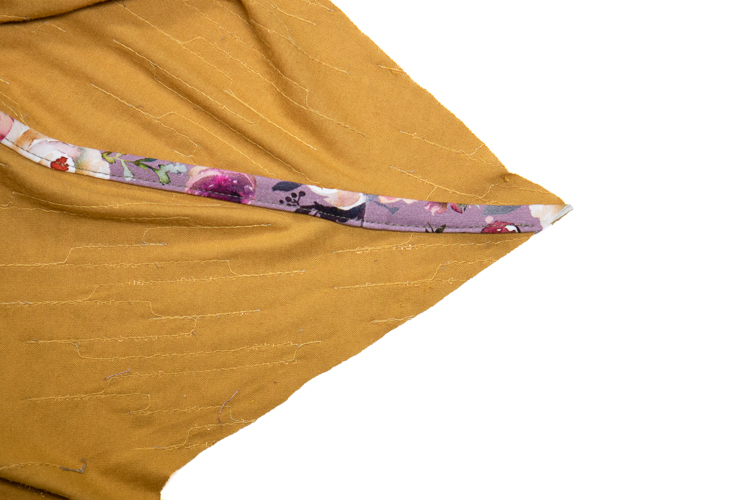
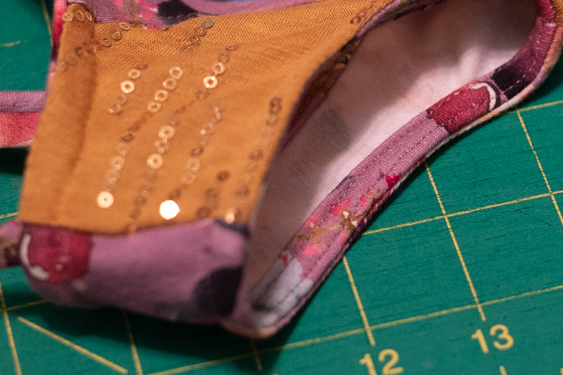
Topstitch the folded edge down, close to the edge. Trim the overhanging strip of fabric off the end, maintaining the original shape of the hood point. Continue on with the instructions in the pattern tutorial.
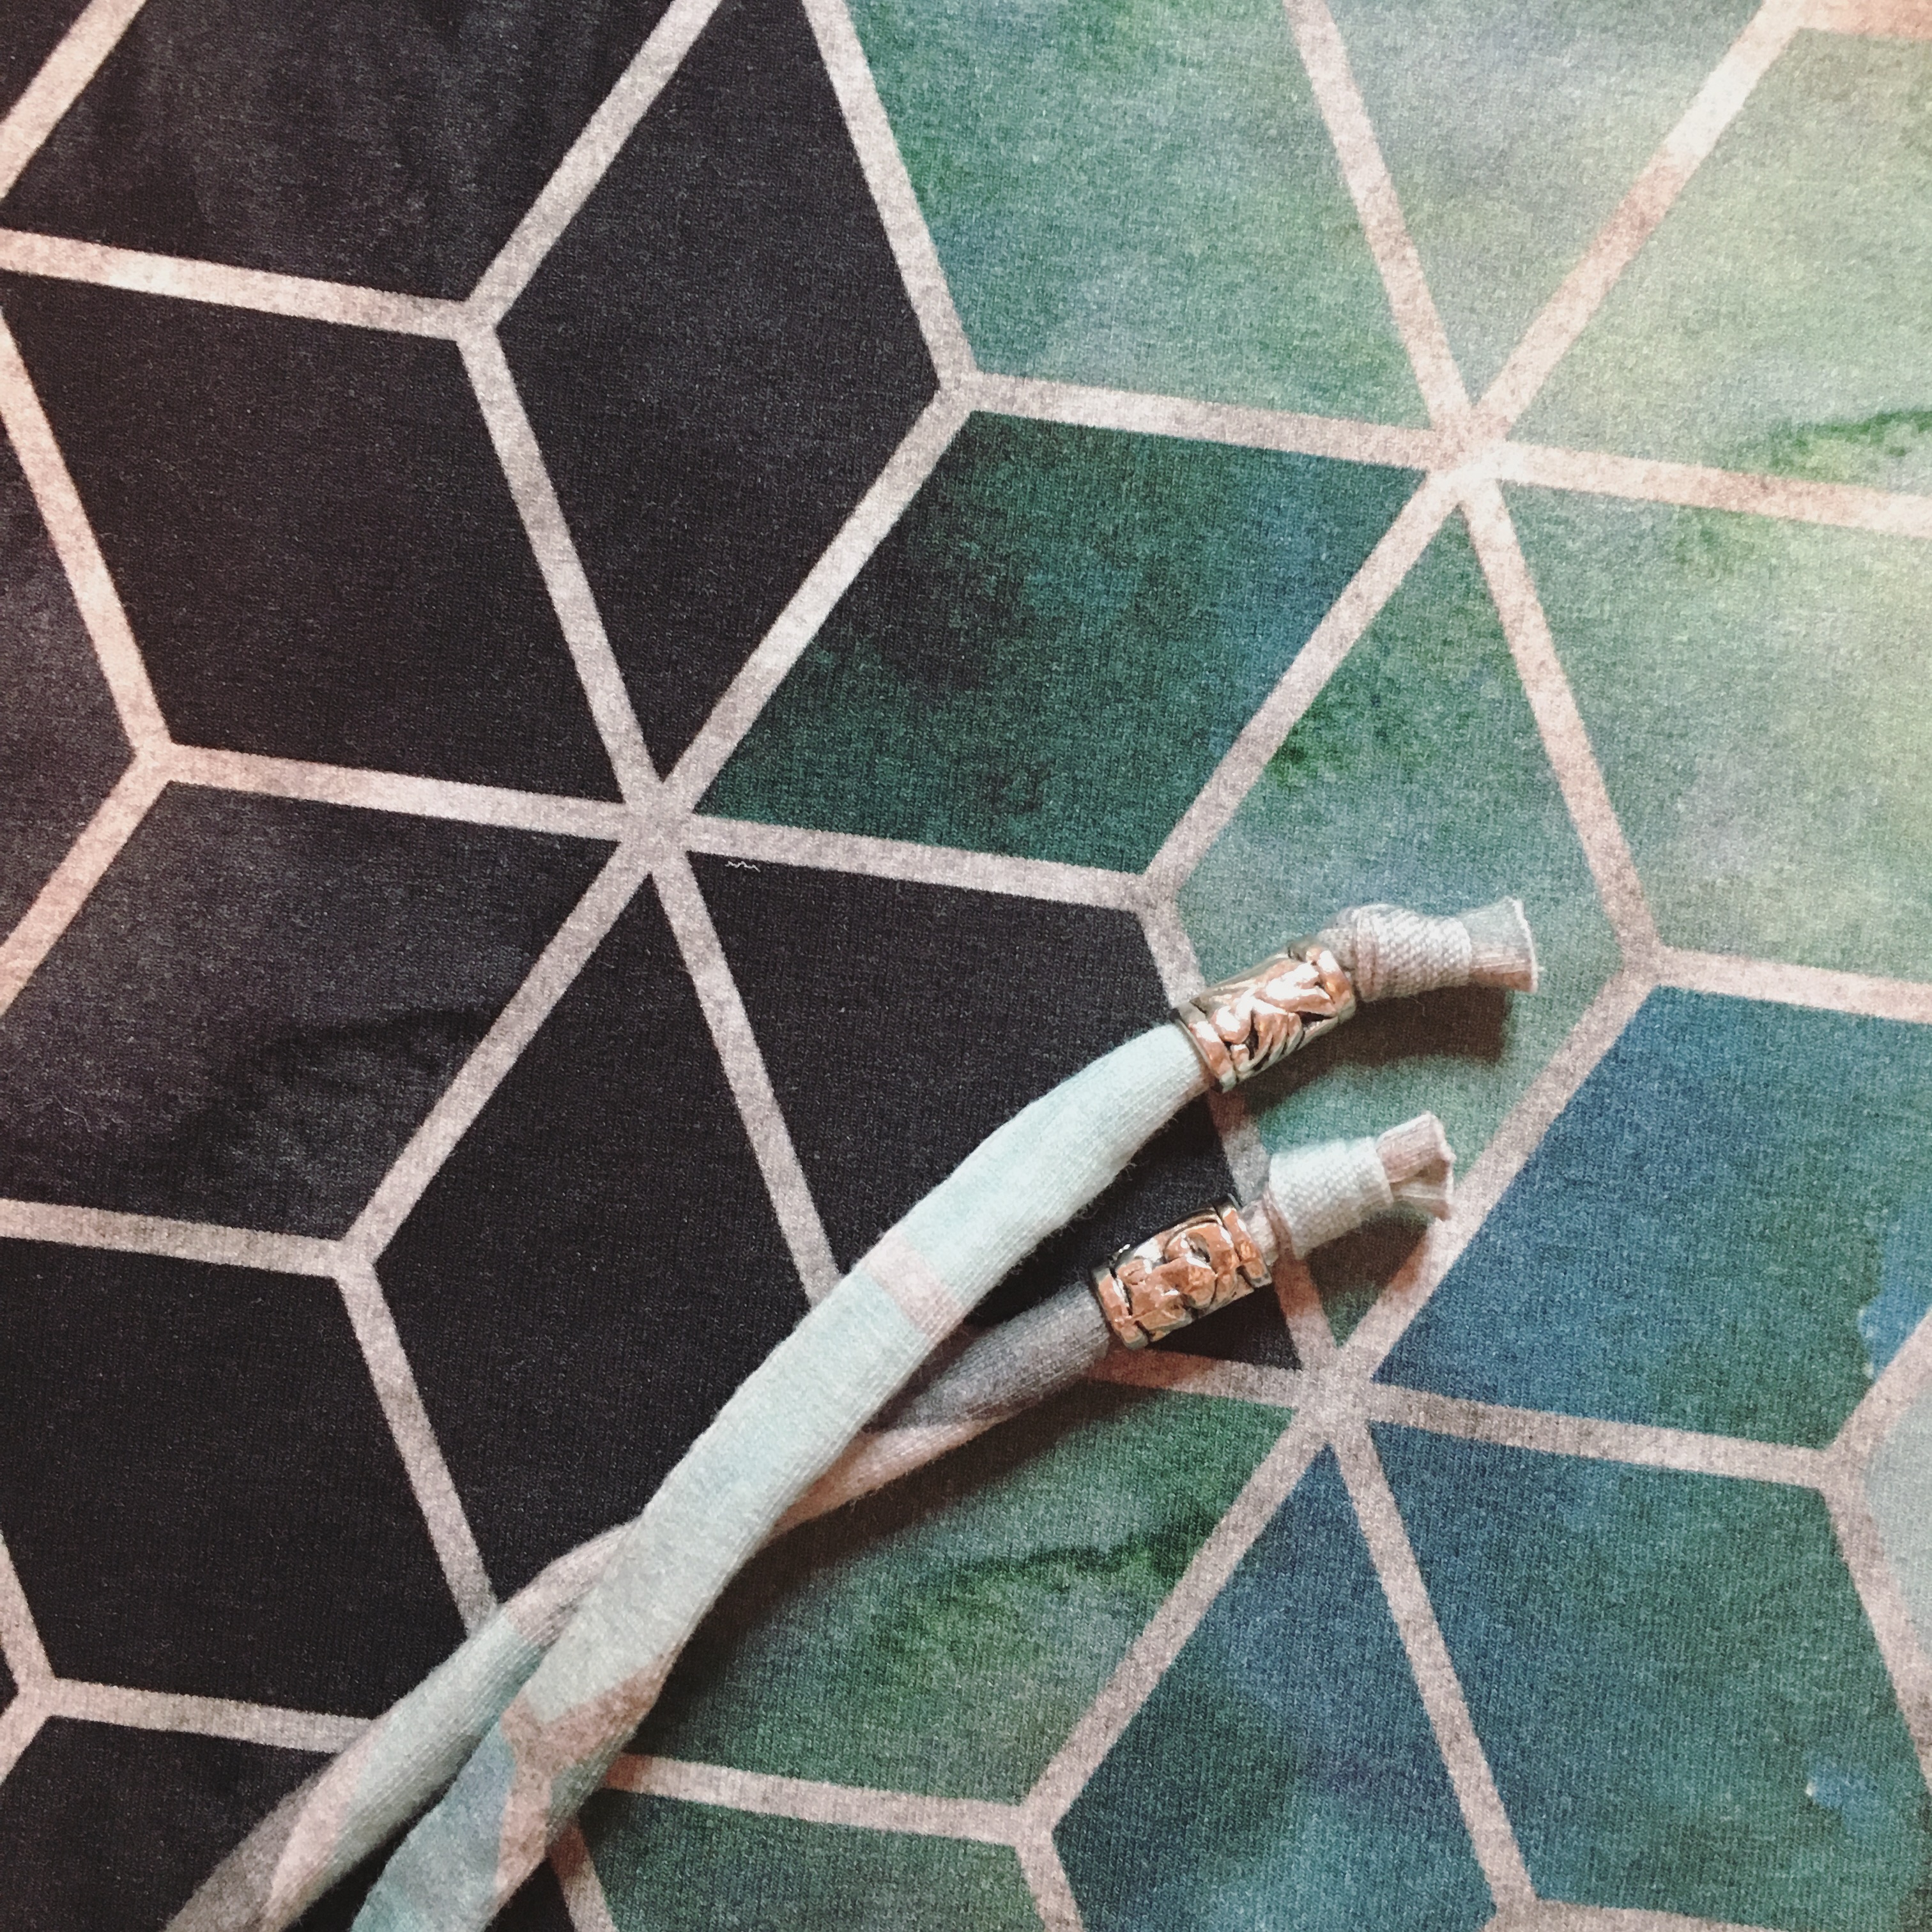
Rachelle of That’s Sew Venice has also given some tips on how to embellish the ties with some beads. Check it out in this link.
You may like to know that our 2 new patterns are available as a Swim Bundle so you can get both patterns for less.

Once again, we had a great time with our testers and we’re so thankful for all their input and time. Check out the hashtags for this pattern and find their versions too. There are some really beautiful outfits to see. It’s always so good to see how different creative minds come up with different fabric combinations and options.
#sofimoss #sofionadesigns #mossinthewild

One thought on “The Moss Maxi”