

I first talked about the Miss Fern skirt a couple months ago when we released the pattern. You can have a read about the things we learned during that test HERE. At that point I was already preparing for this newest Sofiona release which connects to that skirt. Today we have Parts 2 and 3 that are designed to go together with the Miss Fern for a variety of flowing summer outfits.
As well – after we talk about the 3 part dress collection – I have a simple tutorial for how to add an optional skirt lining to the Miss Fern. I found that enough fabrics out there were just a bit too see-through and I wanted a lining option so I’m sharing with you what I do for those situations.

The Miss Forest dress is a sleek, fitted, woven dress with simple lines and you can read about that part of this collection HERE. It’s a whole pattern to itself and thus gets its own blog post.

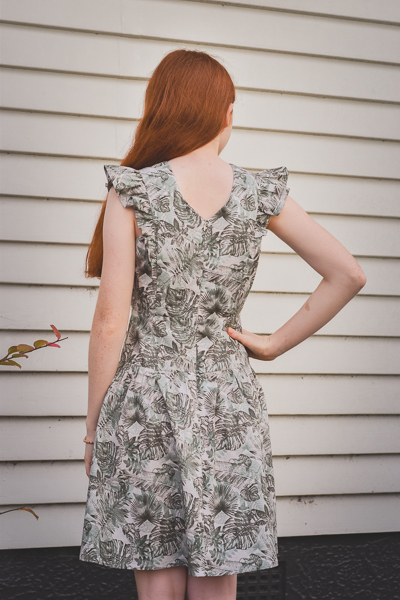
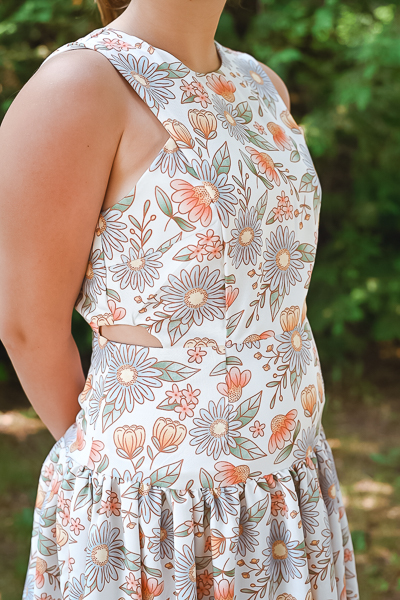
For this blog post I want to focus specifically on the Forest Fern Add-on that is used to connect the Miss Forest bodice to the Miss Fern tiered skirt. This add-on package includes a gathered flounce sleeve option and a darted waistband that works with the tiered Fern skirt. The tutorial includes instructions needed to move the side zipper to centre back. This is necessary to accommodate the center back zip closure on the dress.
FABRIC:
I think the biggest favour I can do for you, the sewist, is to talk about fabric and to let you know you will see different results with different fabric choices. With this knowledge in mind, you’ll be better mentally prepared for the surprises fabric can bring. It’s for this reason that this pattern is labelled as advanced. While the actual sewing steps might be more on the intermediate level, the fabric differences add a level of challenge that we don’t want to be sneaky about and not tell you. I want you to love this pattern and challenge yourself, but I also want to be up front and honest with you that this is not a quick sew for those who aren’t already very familiar and comfortable with woven garment sewing.
The Miss Forest dress with its fitted bodice and A-line skirt is better with fabrics that have more structure and don’t drape so much. The Miss Fern gathered skirt is best with flowing fabrics that allow the gathers to hang nicely without poofing out too much where it attaches to the smooth waistband. With those two opposite fabric suggestions, what does one choose when combining these patterns????
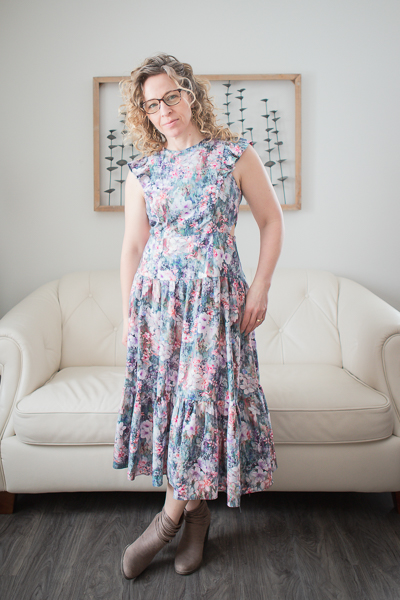
For my Forest Fern combos I’ve been using fabrics that are geared more towards the skirt – the lightweight flowing fabrics. To me, I would rather have less bulk in the skirt because my own hips are bigger in size than my waist already and I’m hesitant about creating too much extra width in that area. This choice means I need to make the necessary adjustments to the bodice since that fabric will fit looser and be a bit harder to work with for fitted bodices. That’s my personal trade-off for the final garment I know I will love the most.
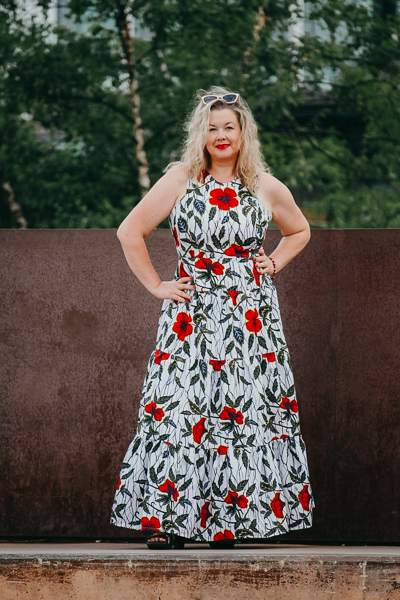
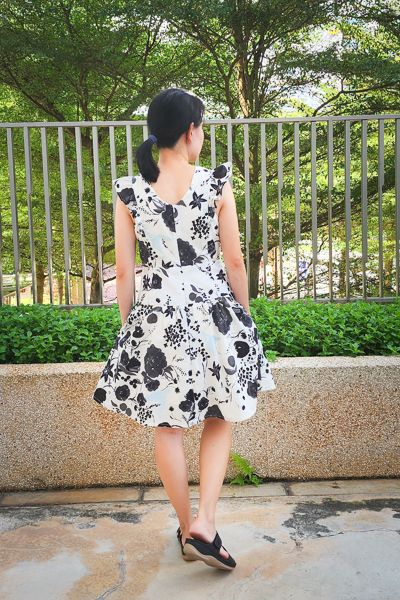
Some of our testers chose the opposite. Here you see a wax cotton that is one of the most structured types of fabric. Great for the bodice and in this case, this sewist likes the extra shape that the gathered skirt gives in the stiffer fabric. She likes this silhouette for her own body that has a smaller hip size than her waist.
So you can see that having some thought on fabric before you begin gives you a head start in understanding what kind of final garment you will end up with. All of this is something I already cover in the Miss Forest blog post and I highly recommend having a look there no matter which skirt you choose for your Forest dress.
The only other thing I’ll mention about the add-on is the flounce, but it’s pretty much the same thing. Stiffer fabric – more pronounced flounce. Softer fabric – gentler flounce.

Of course, feel free to mix and match the options for the Forest Fern combo.
- Which skirt length do you want to try from Fern? Short, Midi, or Maxi?
- Which sleeve do you want? The flounce, the cap sleeve insert from Forest dress, or just the simple tank style?
- Which back will you choose? The Y back or the V back? (Those have nothing to do with the add-on, but it’s another thing to play with to get your unique dress.

Now with that specific add-on chit chat done, let’s move on to the Fern skirt lining tutorial to end this off.
Sometimes these lightweight fabrics can be a bit see-through and you’ll need a lining for the skirt. I’m going to share the following steps for adding a lining to the Miss Fern as a stand alone skirt.
If you are making the Forest Fern dress, use the following information for CUTTING the lining and then follow the optional lining instructions in the Miss Forest tutorial. The pics there will show the A-line Forest skirt, but the same instructions will apply.
Let’s begin.
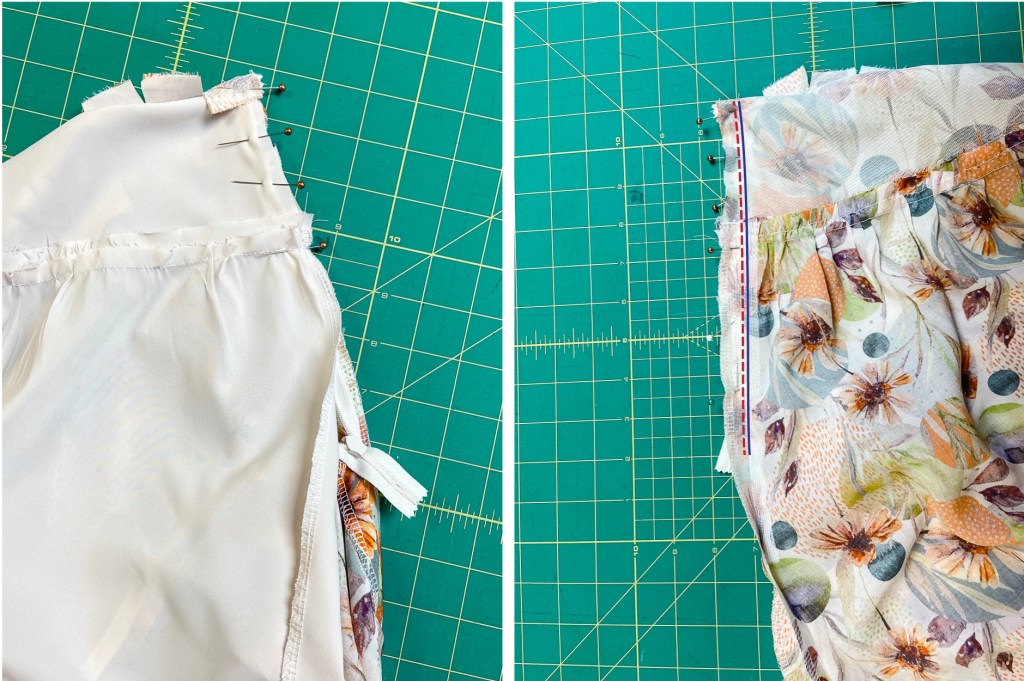
REMEMBER: If you are making this for the Forest Fern combo, you’ll need to remember you will move the zipper opening from the side to the back, so have a look at the add-on tutorial for how we do that before cutting the back skirt pieces.
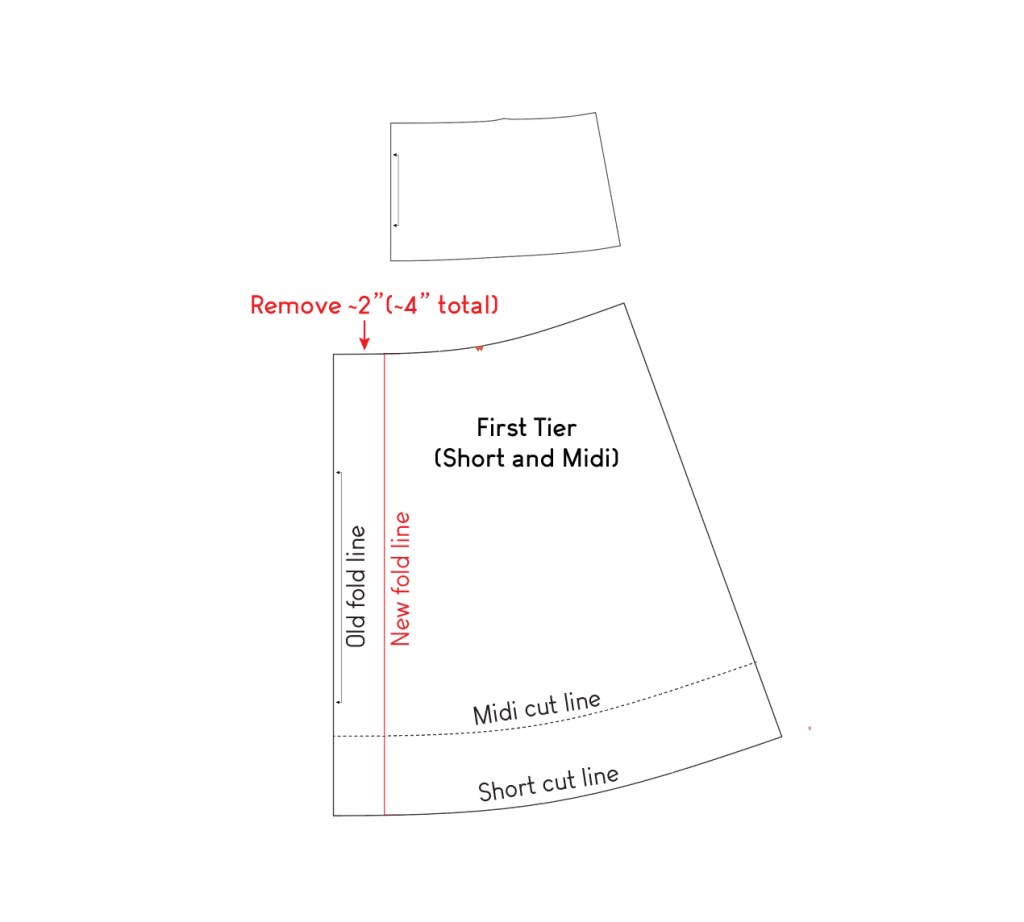
There isn’t a pattern piece specifically for the lining so we’re going to adjust the Short and Midi length first tier pattern piece to create our lining. Even if you’re making the maxi with the different first tier, this piece will work for all length options.
We don’t need the gathering and we don’t want to add bulk in that seam so we’re going to remove some width from the pattern piece to cut our lining. Move the fold line at least 2″ in from the existing fold line. Use the waistband to make sure you don’t remove too much width! Cut along the midi cut line for length. This will make a short lining. If you think you want it longer, you can go ahead and use the short lenth cut line.
(The rest of these steps are geared towards the stand alone Miss Fern skirt only and not the full dress.)

You’re going to construct the skirt up to the point of the waistband lining being attached and understitched. (Step 29 of the tutorial.) At this point, gather the top edge of the lining if you need to – depending on how much width you removed before cutting. Pin the skirt lining RST to the waistband lining and sew it on.

Attach the zipper to the main skirt as instructed in the tutorial and when you trim the 1/8″ off the waistband lining, continue down the skirt lining about as long as the zipper will open.
Turn the lining RST to the main along the top edge of the skirt with the fold exactly at the top edge of the waistband. The SA is understitched so it will be entirely folded over to the lining side. Follow the tutorial instructions about keeping the zipper end out of the way.
Match the seams from the main and lining at the bottom of the waistband and pin the main and lining together matching the raw edges with the zipper sandwiched between. Pin down as far as you can until you reach the bottom of the zipper opening. Sew together using the instructions to sew 1/8″ away from the previously sewn seamline. This will give room on the back of the zipper for the zipper pull to move freely and not get caught in the fabric.
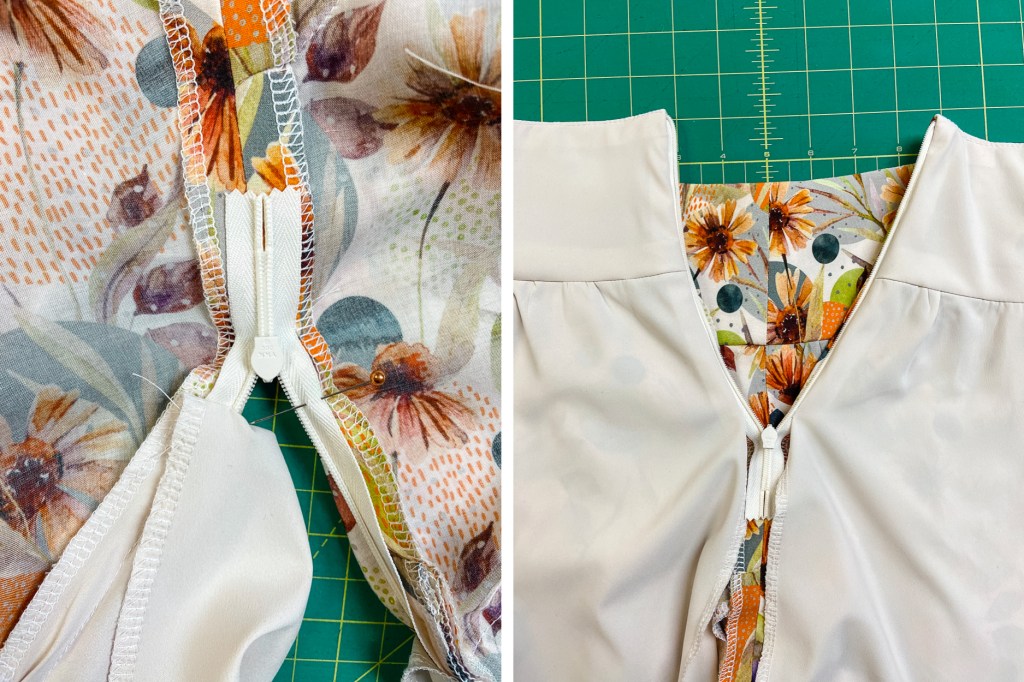
Mark on the opposite side of the zipper tape where you stopped sewing the lining along the edge. Sew the remaining side of the zipper opening up to the spot you marked. Turn the skirt WST and press the edges and corners nicely.
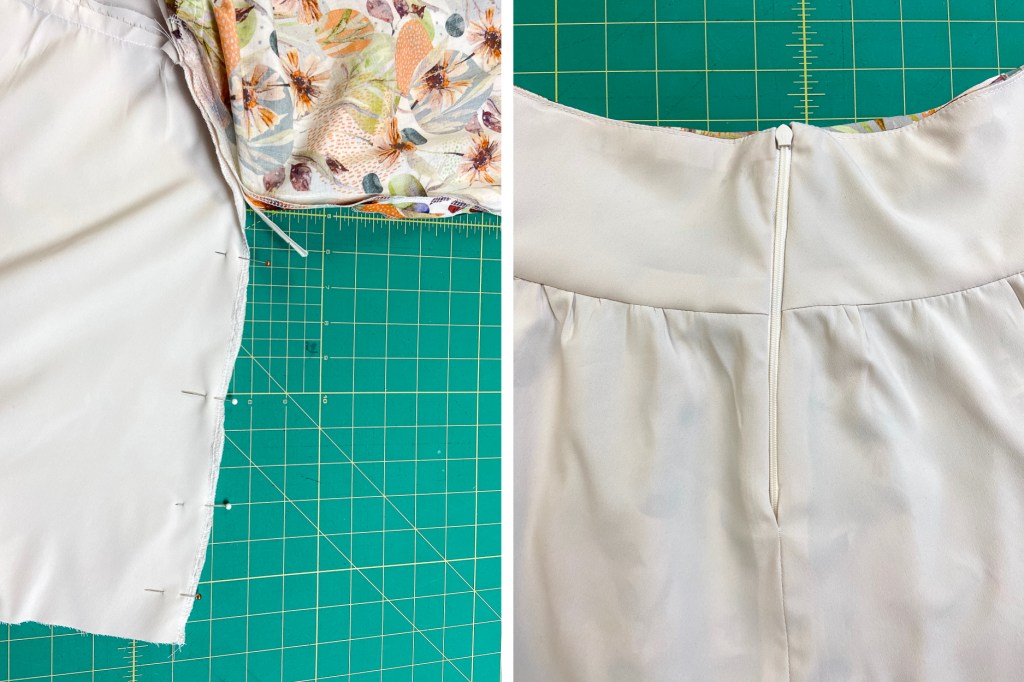
Close the open section of the lining below the zipper by pinning the edges RST and sewing up from the hem and ending as close as you can to the bottom of the zipper opening. Press the SA open. Close the zipper and make sure everything is pressed and looking good and the zipper is able to move freely.
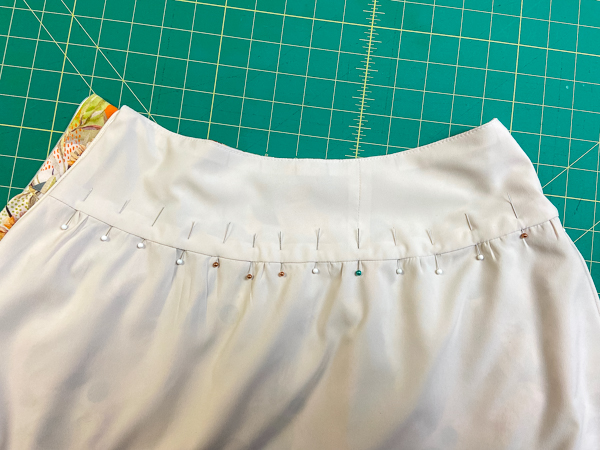
Using a lot of pins, carefully pin the bottom edges of the main and lining waistband WST. You want that seam to be as exactly matched from the front to the back as you can. Turn the skirt over and on the right side, stitch in the ditch along the seam to close the waistband and secure it all in place. You can also choose to topstitch 1/4″ away from the seam on the side of the waistband if you don’t like to stitch in the ditch. Your choice!
Continue with the regular skirt instructions. At the end you can hem the lining by doing a typical rolled hem or you can make it simple and just serge the bottom edge. It’s on the inside and you can decide just how fancy you want that hem to look.

So what do you fancy? Do you like the skirt and just want that? Buy the Miss Fern alone.
Do you want the option to sew the skirt AND the Miss Forest dress and combine the patterns for more dresses? But the Miss Forest Fern that includes all 3 patterns in one bundle.
Already have the Miss Fern skirt? You can also grab the add-on as a stand alone purchase to go with the Miss Forest purchase.
(Yes, I nearly confused myself forever with those options and how to combine them the best way.)
I leave you with a couple more pics of the add-on in action and I bid you good day!!

Miss Fern add on all day long!!!!!
LikeLike